
@moderator
Forum Replies Created
-
AuthorPosts
-
 ModeratorKeymaster
I think we may have finally found a viable water tank repair solution. We bought a flexible bladder that was custom made to the size of the fiberglass water tank so it fits nicely without need for more support. Surprisingly, the cost of this custom made tank was less than an off-the-shelf pillow bladder tank of a similar size(our cost was about US$250 including shipping + tax). We cut off the top of the fiberglass tank, measured the fiberglass tank cavity carefully, sent the supplier a drawing, and after some email and phone negotiations, we had the custom-made tank in our hands about 10 days later.
The tank is made of a very tough NSF-61 approved potable water tank fabric, which is pretty stiff but still flexible. We requested two 7″ clean-out ports positioned in the correct place for the floorboard cutouts, and the fittings required for the inlet and outlets. The supplied hose connection fittings were not quite what we expected, so it was a bit of a hassle to get all the right NPT fittings from the local DIY store, but in the end it works.
If you live in the US and want to work with the same supplier, check out Seattle Tarp (http://www.seattletarp.com/products/bladders-and-tank/). This is a small family run company, I worked with Deano. If you want to order a tank from him, I could supply a scanned copy of our drawing, and offer some lessons learned about what we would change in our order to make the connections easier.
We’ve only had to the tank installed for about 2 weeks, using it for one cruise, but so far so good. The tank was a bit plasticy smelling on first arrival, but we let it air out in the sun for day, and gave it a good soap and water wash before installing. Though the fiberglass and flexible tanks are the same size, it’s pretty hard to get the stiff “flexible” tank into position without any wrinkles. It will likely get condensation accumulating between the fiberglass tank and outer wall of the flexible tank since the two surfaces are not in close contact everywhere due to the wrinkles. I think we’ll remove it each winter to make sure it can dry out underneath. Removal will not be easily because of all the hose connections, but doing so seems prudent.
July 17, 2011 at 18:34 in reply to: Welcome to Jean-Claude Limasset, owner of Vanikoro hull #3 #9621ModeratorKeymasterHi Jean-Claude –
I looked for your boat for sale on both those sites, and did not find her. Is she supposed to be listed already?
If you would like to list your Nic 38 for sale on this site, go to the main forum page, then scroll down to find the Sale or Trade topic, and click on For Sale or Free. You can add a new topic there. (or you can just follow this link to reach the correct forum area to post.
ModeratorKeymasterAfter we had the “starter not disengaging problem” as described above – to troubleshoot it, we disconnected the cable from the solenoid to the starter. Then we turned the key and listened for the solenoid click on and off. That’s when we learned that the solenoid problem was intermitant; sometimes it did not click to indicate the solenoid disengaged after the key was released. A sharp whack with a screwdriver would get it to disengage. So our problem was clearly the solenoid and an electrical problem.
It sounds like Arild’s problem was a mechanical problem. Presumably, in the case of the mechanical problem, the solution is to shut off the diesel, rather than in the electrical problem where the solution is to shut off the battery.ModeratorKeymasterI am posting for Arild, who also is temporarily having login problems: Arild sent this to me via email:
Quote:I don’t think I can give any advise on the diesel problem, but I would like to comment on the starter engine not disengaging after the Perkins has started.Our 1974 model 4.108 had this happen once or twice two years ago. I removed the starter engine and found black rubber particles which may have prevented the starter from retracting from the flywheel. A year later I understood the rubber particles came from the drive bushings between the flywheel and the gear and replaced these.
Arild
ModeratorKeymasterWe insulated the box with a rigid sheet of foil covered closed-cell foam product that we purchased at our local DIY store. I think it was 1″ thick. We cut the sheet into pieces required to closely line the interior walls, and then sealed each cut edge using foil tape before installation. (It’s important to not let condensation get into insulation or the moisture will degrade the material’s insulation properties).
We positioned each cut piece inside the box with a close fit, and then to protect the foil from being punctured, we put cut sheets of formica over the installed insulation. Finally, to further stop moisture from getting to the insulation, we used caulk all the corners. So now we have a decorative formica-lined interior that is about 2″ smaller all around.
All this has noticeably reduced the duty cycle. It runs about 5 minutes out of every 25 now, when the outside temperature is moderate.
An important thing to do, however, is to ensure you still have circulation from the cold plate in the icebox to the lower portions of the box. Since we shrunk the inside area, the original shelf no longer fits. So instead, we use some baking wire racks along the back and bottom so that the goods do not sit flush with the wall, and some air circulation is possible. Hope this all makes sense!
ModeratorKeymasterQuote:I understand for example, that the newer hull numbers have the nav desk looking forward and the older ones looking aft – or is that an owner’s modification?Rainshadow, hull #126 (1974), has her nav station at the aft end of the dinette in the salon, facing aft. This is rather late in the production run, so I suspect a forward facing nav desk is an owner modification. I have a hard time even imagining how that might be possible.
Quote:Some have had the aft cabin modified to make a usable double bed.Rainshadow’s aft cabin has a “double bed” on the port side. The PO enlarged the area by moving the fore/aft running bulkhead slightly inwards as far as possible to widen the berth area behind the port side aft head “locker”. The cushon is about 50″ wide at the top, but narrows down to someting like 27″ at the foot. It takes a limber body to get in/out of this berth, and the person already in the bed must stay smashed close to the hull as the second person climbs in. Then you play footsie all night long. Suffice to say, it can be clostrophobic at times for the person on the hull side, and quite stuffy.
The other nice modification the PO made in the aft cabin was to turn the starboard side berth into a chair at the fwd end of the aft cabin, and a useful set of drawers in line where the cabin top drops down just before the mizzen. Behind this set of drawers, accessible from the aft deck locker, is the propane storage locker. Having a reasonable chair and all the drawer storage is more useful than another quarterberth, especially since the port side quarterberth is now a friendly double.
In addition, the aft head has been turned into a hanging locker with its nice tannoy vent(more storage the better), and the aft sink has been removed. This left 3 unused thru-hulls in the aft cabin. We are considering using the aft head inlet (located in the bilge under the aft cabin floorboard) as the inlet for a saltwater pump at the galley.
To get a better general understanding of the boat and her design, I encourage you to contact Jeremy Lines to get a copy of the CD, which is described here
Also, just browse all the postings in this forum. The owners are a wealth of knowledge, both with nifty tricks, as well as useful things to watch out for.
ModeratorKeymasterWe had a problem with the solenoid, which I describe below, but it makes me wonder whether your engine problems are unrelated to your solenoid problems. Let me describe our multi-faceted problems.
Earlier this spring, when attempting to start the engine, nothing happened. In time, Van traced it to a failed acuator in the solenoid, but he could still push the button to start the engine. After the engine had been running ~20 minutes, he noticed the alternator was still putting out unusually high current. He checked the voltage on the batteries, and realized the altnerator charging circuitry had failed and that the batteries were being cooked! (I believe he posted about this already). So, he proceeded to spend a few weeks replacing and rewiring the entire charging and starter system (and its greatly improved, I must say!) Were the failed solenoid and failed voltage regulator related? Don’t know. Oh, BTW – he also discovered during the repairs the alternator switch was going bad, and that the engine shutoff cable had nearly failed. Certainly those were not related. But we certainly had a cascading list of failures occuring all at once!
BTW – we looked everywhere for a solenoid with a push button switch on top. They are no longer available in the US, so we ended up using a standard starter solenoid from NAPA. Too bad, that push switch was a nice feature. If you found once again, Trevor, please let us know where.
Then, about a month later – the new solenoid failed in the way Trevor describes. It was a cold day, and the intent was not to start the engine so we had not used the glow plug (Van was testing the new starter key circuitry in fact). He turned the key, the solenoid engaged the starter and the starter motor started. He turned off the key, and the solenoid did not disengage so the starter motor kept running! He had to turn off the battery switch, just like Trevor did. Though it was easy to jump to the conclusion that the new key was wired incorrectly, he eventually traced the problem to a faulty solenoid accuator. About 1 out of every 10 times, it would stick. This was worrying, because if it did achieve starting the engine, we might not hear the still engaged starter motor and so it would probably get destroyed. I don’t know – can you hear the starter motor when the engine is running? We thought about rigging up a warning light to show if the solenoid acuator was engaged still – but in the end, we just got a replacement solenoid because it was still under warranty, and stopped thinking about it. NAPA said that on a rare occasion, that does happen with this solenoids, but they swear they are good quality parts….
So – my point is, maybe a gremlin is causing your solenoid, fuel system and engine to all have failure problems at the same time, but they are unrelated. It can be very confusing to troubleshoot when there are multiple points of failure. Keep an open mind when you are working on this.
ModeratorKeymasterThis is an excellent question, Jacques-Paulus! The short answer is – look for corrosion. But with crevise corrosion, it can be very difficult to see how bad it is, unless you do destructive analysis (or at minimum exploratory analysis). We pulled some chainplates, and found crevice corrosion that looked like small pits on the surface. Using a rotary tool to grind through, like a dentist would with a cavity, we discovered those small pits became ~ 1 cm long cracks that ran along the length of the rod, about 1mm under the surface.
Regarding the tailpieces, we should be able to give better hints about what to look for because we have the failed part in hand. Van and I will do some analysis of the break and repost.
I do need to correct myself though – those tailpieces are not bronze; they are copper, or at least a very copper rich alloy. So this was not likely to be a zinc-loss galvanic corrosion problem.
ModeratorKeymasterThanks for the offer for more information – I’m keen to know about the refrigerator installation, or more specifically, what was required to remove the original fridge. Did you have to destroy the port side cabinets, or is there some clever way to get the box out? If you have a lot of info about this, I request you start a new posting in the Forum under House Systems>Galley so its better categorized than here.
I’m curious because our Adler Barbour unit is still working great, but the insulation in the box itself needs improvement. We added insulation sheets to the inside, decreasing the size of the box, but we still notice the unit’s duty cycle increases when its a warm day and the inside of the hull increases in temp. We’d like to replace the box, but it appears to be “built in” – as is, no way to just remove a few screws and pull it out without destroying the cabinetry!
ModeratorKeymasterI wonder if this is one the Halmatic hulls made after #134 – Jeremy said there were 10 hulls left when C&N stopped production of the Nic38, and so the hulls were fitted out by others. Undoubtedly the windscreen would have been very expensive. Same rationale might apply to the missing mizzen.
June 9, 2011 at 19:32 in reply to: What is the correct dimension of the packing material for the packing gland? #9311ModeratorKeymasterThanks for the prompt response!
ModeratorKeymasterThanks for the advice, Mike. I agree that this is highly usual for US companies, I was astounded by this customer service.
I *was* talking to “the boss” – there maybe someone higher, but I think this a small company that handles the US market for a product made in Europe. I’ve spoke with “the boss” before, and she’s always a bit gruff. Some of the other people there are quite nice and helpful – I feel sorry for them.
In regards to “the boaters will take our business elsewhere” threat, this is how the conversation ended:
Me> So, you are saying that this is completely my fault, and it couldn’t possibly have anything to do with your product?
Boss> Yes, that’s right. You put something in our product to make this happen.
Me> Well, I’m going to make sure everyone in the boating community knows not to use your product.
Boss> That will really hurt as a lot. CLICK.So, the boss lady cares NOTHING about boaters. I strongly encourage others to spend your money with a company that is more friendly. Some people use the Sanitred product to seal their wooden boat decks – it would be horrible if this slimy stuff was all over a deck!
ModeratorKeymasterI reported last year that we tried repairing our water tank with Sanitred products (Permaflex and LRB). This turned out to be a terrible disaster. The product continues to exude oil after 10 months. We followed their instructions very carefully when applying the product to the fiberglass tank walls. The manufacturer assures us that once the product is cured, it stops forming this oil. And yet, we have had this total failure.
The people at Ideal Products in the US, who sell the Permaflex and LRB Sanitred products, say they have never heard of anything like this. I tried to get some troubleshooting help from them. First person was working with me, but he passed me to his boss because he was baffled. The boss lady is not so nice.
I told her we followed their instructions closely during the application, but she accused me of added something to their product to make this happen. I told her in desperation after cleaning the tank with soap and water so many times over the last 10 months, that last week we cleaned the tank using paper towels wetted with rubbing alcohol to get rid of the oil we found accumlated in the tank. Their website says the product is resistant to most solvents, so I figured this was a safe bet. (The tank was slimy with oil again less than a week after this treatment.) She said using alcohol to clean the tank voided the warranty. She took offense to my suggestion that something might be wrong with their product, or perhaps their quality control. She actually hung up on me.
So – lousy product in our experience, and one of the worst customer service experiences I have ever had. Never deal with Ideal Products in the US or use the Sanitred Permaflex or LRB products in your water tank.
Here’s a photo of the oil floating on the tank surface, after we had left some water in the tank over the winter. That big oil blob is about 4″ across. There are more blobs like this outside the photo. When we wiped the oil off using paper towels, there was so much on the walls it puddled downwards. When we eventually drained the tank completely, we had about 1/2 cup of this oil. And it reeked of the Sanitred product smell. They tell me its inert and potable water safe. Would you drink this?
 ModeratorKeymaster
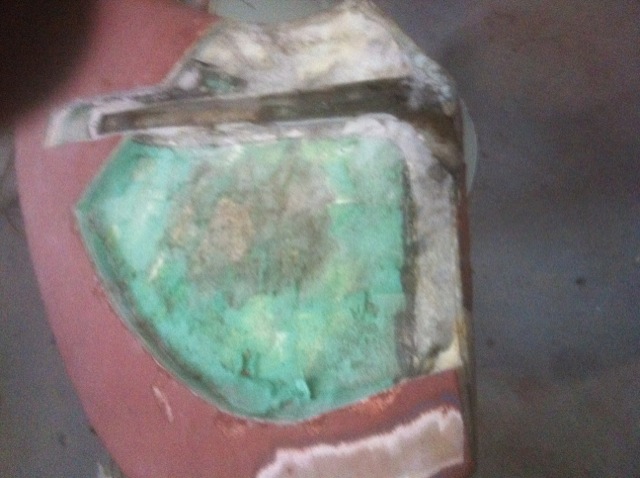
Charles also sent me the photo of Rampant’s rudder cut open – this must be the top portion of the rudder, since it shows the metal support inside that is positioned above and aft of the aperature. Again, see drawing 65 of the Nic 38 CD to understand this.
 ModeratorKeymasterModeratorKeymaster
Hi Charles – How did you detect the movement? We will be hauling Rainshadow in about a month, and I’m trying to discover what to look for before any problem becomes so serious that it might lead to failure. When sailing in a good wind, we can get a vibration when turning the helm, but that seems to be coming from the mathway steering bearings rather than the rudder itself, because the vibration frequency seems too high to be coming from the rudder in water.
When your rudder was cut open, was there any evidence of crevice corrosion of the stainless rudder stock? Do you have any photos of what you found?
The Nic 38 CD that Jeremy Lines put together includes a rudder drawing, so I have some idea what’s inside.
ModeratorKeymasterAnd here are some photos of Trevor’s (Ronar M) motor mount:

 ModeratorKeymaster
And as proposed, here is Trevor’s (Ronar M) burgeee

He says
Quote:I bought an N code flag for £14.99 and had Ocean Canvas in Plymouth make the letters for £12. I sewed the numbers onto a bit of old sheet and then sewed these onto the flag.ModeratorKeymasterRemember, that useful document that Mike (angelsson) mentions from Daniel the Physicist is already available on our About the Nic 38> Equipment Manuals page.
Also, higher in this thread, I mention an external website that has electrical schematics, etc.
ModeratorKeymasterI am posting this response for Jeremy Lines, who is retired C&N, but was a principal involved with the Nic 38 builds.
Quote:Our displacement figures were normally shown as Half Load Condition which was with all normal cruising gear aboard, tanks half full, a small amount of stores but with no people or personal gear. The Nicholson 36 was shown as 7.52 tons with 3.15 tons of lead. The 38 as 7.1 tons with 2.65 tons of lead. The 36 had a heavy construction with a complete wood framed deck as compared to the 38’s GRP deck. The 36 had a much taller rig and was for racing whereas the 38 was for cruising with much more form stability. The 38’s attracted much more cruising gear so there will be few 38’s under 8 tons. Their sinkage will be 0.39 tons per inch. The 39 is a much larger yacht, over 3′ longer on the WL and a foot more beam. Displacement increases as the cube of the dimensions.ModeratorKeymasterWe have a Yamaha 8HP on the same bracket in the same place, and have the same problem as Rhapshode with the sheets getting tangled in it, and to some degree, the same problem as Jeff (it is heavy too, but not as heavy as Jeff’s because its only a 2-stroke!)
We have solar panels mounted on the pushpit both SB and Port. Then there is the spare fluke anchor, and the BBQ – the whole area is a bit crowded, and we are keen to try what others have done – extending the stainless pushpit railing all the way to the gates, instead of having lifelines from pushpit to gate.
Marilyn & Van on Rainshadow
ModeratorKeymasterThanks J-G. Rainshadow’s current nav light setup is strictly in compliance with the Colregs because it has the masthead tricolor at top of main mast (on switch A), steaming light lower on the main (on switch B), and 360 anchor light on mizzen (on switch C). We’re careful to flip the right switches to correctly signal our current status (i.e. anchored vs sailing vs motoring).
It seems the masthead tricolor is a great idea when at sea and captains should be scanning the horizon for any lights. But our concern is about night sailing in our local protected waters, some of which have restricted channel widths (we live in Seattle area, so have the San Juan and Gulf islands nearby). Some boaters may not be looking so high in the air to see the masthead tricolor and even if they are, they might confuse our lights with lights onshore and uphill. Deck level nav lights will make our boat length more recognizable as well. So that’s why we are considering adding a 4th switch that will control the bi-color decklevel bow lights and the correct angle stern white light.
Cheers – Marilyn
Roger Haggar sent me this via email:
As on Race Passage you will probably find that the stern light was originally positioned on top of the mizzen mast. The PO probably removed it when he installed the mast head tricolour.
When you think about it, it makes sense to put the stern light as high as poss. as having it placed on the transom as we know it does not make sense as it would disappear from a following boat’s sight at 100 yards in a seaway with a wave height of more than 3 ft!!
Cheers-Roger.ModeratorKeymasterRoger Haggar also emailed me some very useful Camper & Nicholsons documentation, showing the white metal bearing and the instructions for how to remove the stern tube. More extremely useful stuff, which you can find as a PDF listed on the Nic 38 – equipment page (or open the PDF from here)
ModeratorKeymasterThanks Richard – that’s an interesting idea for the placement of the stern light. How did you run the wiring through the pushpit upright tubing? And then through the deck?
With regards to the messenger line in the mast, there is already a posting about that here.
And finally, how to post photos – that one is hard too. Read this and this
-
AuthorPosts