Welcome Back › Forums › Deck and Hull › Interior outfitting › Vinyl Covering Removal
- This topic has 9 replies, 6 voices, and was last updated 6 years, 5 months ago by
 David and Felicity.
-
AuthorPosts
-
April 18, 2015 at 17:22 #25768
 Ronar MParticipant
Hi All,
The white(?) vinyl coverings to most of the bulkheads and other ‘walls’ on Ronar M are getting tatty; they have gone yellow (or worse) are brittle and beginning to crack. I have had the idea of just pulling them off, cleaning up and then painting the ply / GRP (?) surface underneath.
Has anyone tried this? If so, how did you get the vinyl off and what is underneath? Also I was wondering about that perforated MDF stuff up under the deck. This is also looking tatty especially over the stove. Has anyone replaced this with anything else? How important are all the holes for ventilation?
Your experience would be welcome
Cheers, TrevorApril 18, 2015 at 20:51 #25773 ModeratorKeymaster
Our vinyl wall covers were looking dirty, so about 5 years ago I washed them and then painted them with a latex interior paint, such as would be used inside your house.
While it looks better, the dried paint remains slightly tacky so fluff tend to stick to it. I’m not sure why the dried latex paint is so tacky over this vinyl – but maybe a different type of paint would fully cure to a hard finish.
I suspect if you pulled the vinyl covering off, you would have a problem cleaning off the adhesive to achieve a suitable finish for painting. We did pull it off in some repair areas, and as I recall it left a rough surface behind.
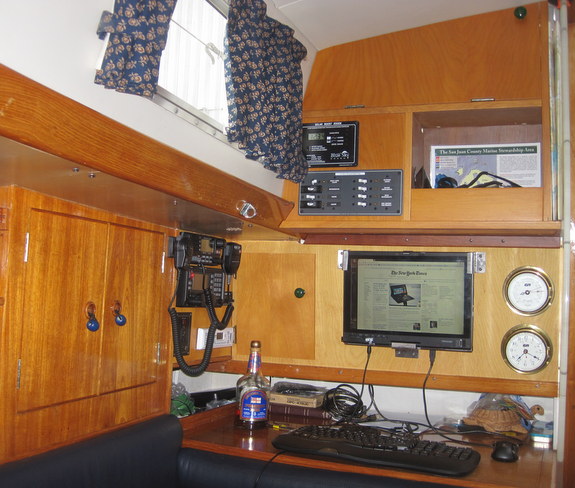
As for the perforated MDF stuff, several years ago we replaced select areas with a 3mm plywood skin without holes. We decided the ventilation was not necessary for the electrical wires that run through those “chases” as they are not carrying much current. You can see one of these replaced areas in this photo:
Marilyn
April 19, 2015 at 15:10 #25776 JeffParticipant
Hi Trevor,
I’m busy right now with renewing my headlining. I had a leak coming down through the fwd saloon ventilator on to the saloon seating so in my ignorance I pulled off the headlining, to get to the underside of the vent through the deck. Turns out one doesn’t get to the underside of the vent cowling this way. you just cut it off & then re-stick it down onto the deck again.!
Anyhoo, I fixed the leak from topside & having taken the headlining off & scrubbed it, it didn’t clean up at all & proved impossible to re-instate so I’m keeping it temporarily, as a template. The plastic edging is obsolete & irreplaceable so I’ve taken it all off & replaced it with 6mm pine strips from Wickes to which my local upholsterer will staple some new cream unfoamed vinyl early next week.
I’ve insulated the 2 major areas of the saloon under-deck with closed-cell camping foam 1st though, as I live aboard all year round now. Should keep me a bit warmer as there was nothing there before, just half an inch of air-gap & there was quite a lot of condensation clinging on to the under-deck when I removed the head-lining.
HTH, JeffApril 20, 2015 at 02:35 #25779Orion
ParticipantHi Folks
Removing the vinyl, on the bulkheads, was one of the first things I did, after finding Orion. Underneath is an exceptionally pretty grained mahogany plywood. It is NOT a veneer plywood. The surface mahogany ply is thick enough to clean and sand safely. The mahogany bulkheads as well as the teak trim, are oiled, with a recipe of linseed, turpentine and a little epiphanes.
I wouldn’t hesitate, for a second, to tear out every shred of vinyl AND that antique Formica.
michael
OrionApril 28, 2015 at 11:24 #25785Ronar MParticipantHi All,
Thanks for all that good advice. I am encouraged to remove the vinyl and either varnish the wood underneath or paint it. I can also see the day arriving when the headlining has to go too – and the perforated board. It’s good to know others have done it. I’m not sure about the stapling of the new headlining, Jeff – are the staples stainless?
Cheers, Trevor
April 29, 2015 at 06:51 #25786JeffParticipantHi Trevor,
I changed my mind about the new vinyl & re-instated the old vinyl. I finished the 2nd section yesterday. The upholsterer had previously brought all his gear aboard, along with the new unfoamed vinyl including an electric compressor staple gun, but we found that he couldn’t get the gun nozzle close enough to the edging to get the staples in so we scrapped the idea.(& I probably saved +/- £200 for his labour @ £35 p.hr & 4x metres of vinyl that he wanted £15+ p.metre)
It’s always upset me that I took off the headlining unnecessarily, even if it WAS old & discoloured it was fine.
So, last Friday as an experiment, I bought a load of 3mm x 12mm brass screws & brass cup washers & had a go at putting it back up myself. I was so pleased that I just carried on & put it all back the way it was, but it’s not perfect & to my mind looks a bit amateurish. The centre-line where the 2 halves meet across the centre of the saloon has a double row of brass cup washers, which I’m not too happy with & may cover with something from B&Q.
If I had to do it again I would just use my little staple gun with 6mm ordinary staples, then find something from B&Q to cover the edges.
HTH
JeffMay 29, 2015 at 08:54 #25803Ronar MParticipantHi All
I have done nothing with the vinyl on the bulkheads yet as I have been preoccupied polishing the topsides and antifouling etc. I have also replaced all the interior lighting with LED. I got 10 bulbs which fit the old fittings for £29.99 from Amazon. I sympathise with Jeff and see the day when wiring or some other work necessitates the removal of the headlining – in fact I have put off jobs knowing what a hassle it would be to put back. I would like to replace it with ply or matchboarding which could be taken down for jobs to be done and then easily put back up. Any experience of that out there? It’s so difficult to explore the pros and cons if you daren’t take it down to look. What is there above the headlining to fix anything new to?
Cheers, Trevor
May 29, 2015 at 13:39 #25806JeffParticipantHi Trevor,
In my case, as per my previous post…nothing except an air-gap of 1 centimetre & bare fibreglass.
BTW, I ordered St/steel staples from Hawke House to tidy up the edges of the h/lining but returned them as they didn’t fit my stapler. Stapling would be the easy way to do it if you replace the plastic edging with, say, 6mm edging from Wickes. The edges that meet right across the centre of the saloon are screwed into 6mm deep by about 30mm width timber as that replaces the double side-by-side track for both h/lining sections.
The other little problem was the area overhead where we leave the saloon & go forward past the hanging lockers. The fwd edging of the saloon section is fixed to another double track of edging, the other side of which is the h/lining above the narrow passage-way to Port of the fwd heads.
I didn’t remove that section of plastic edging as I didn’t want to interfere with the Fwd h/lining so I re-clipped a section of the old plastic (female) edging back on to the original male & screwed my brass screws into that.
I don’t envisage having to remove it ever again as I can already get to any existing wiring & I certainly won’t route any new wiring above the h/lining:)
HTH-JeffJanuary 12, 2020 at 08:52 #26658Ollie Holden
ParticipantI have replaced all vinyl on both bulkheads and headlining – I am happy to answer any questions on it. It makes a big difference to the feel of the boat.
January 26, 2020 at 21:09 #26664 David and FelicityParticipant
IHi Trevor,
We painted the vynil with Sadolin Superdec, a water based exterior paint. It takes a couple of coats to give a good coverage but there is no cracking and the paint has fully cured. We have also replaced the deckheads with 4mm ply, again painted with Superdec. It makes the whole cabin look much brighter.
David
-
AuthorPosts
- You must be logged in to reply to this topic.