Welcome Back › Forums › Deck and Hull › Deck and deck fittings › Replacing Teak Deck
- This topic has 13 replies, 7 voices, and was last updated 7 years, 1 month ago by
 Dario.
-
AuthorPosts
-
August 4, 2017 at 10:50 #26126
Ollie Holden
ParticipantI’ve taken the plunge and decided that we will replace the teak deck on Nutmeg. I know it’s not cost-effective but then boats aren’t. I see it as a duty of ownership. Nutmeg is in the yard on Hayling Island (UK) and is in the process of being stripped down. I’m posting this to gauge interest from others in following the progress. In the course of doing this I’ve had to pretty-much strip out the interior, and obviously there are a few bits and bobs I’ve uncovered. Happy to share as much or as little with folk as is useful – pitfalls, costs, photos, names of good/bad shipwrights, whatever!
August 4, 2017 at 11:31 #26127 ModeratorKeymaster
Thanks Ollie for the offer! Rainshadow doesn’t have teak decks, but I’m curious about the teardown process.
Was it destructive to remove your icebox? Sometimes I wonder if we should remove it to get better access for insulating, or replace it.
For the primary winches, we’re having trouble accessing some of the bolts that hold down the winch bridges. Were there any surprises when you removed yours?
Have you seen any aluminum backing plates bedded in the FRP that need repair/replacing? For example, at the stanchion bases? We are rebedding everything that penetrates the deck before backing plates etc. get damaged from failed sealant, and I wonder about some of ours due to stress cracks on the deck.
As moderator, I can post pictures within the forum postings, but I am sorry you cannot. If you can post photos elsewhere, you can add links to those photos here – see this posting for more info.
Cheers – Marilyn, moderator
August 4, 2017 at 18:40 #26129 Czarina BlueParticipant
Hi Ollie,
Having filled 235 holes from the past two or three teak decks’ screws at different times on Czarina Ue, using sealant and textured fibreglaas squares in order to seal with water penetration, I’m sure our decks will come off in the next five years to properly remedy the problem from above. So I’m interested to know the cost and factors involved though I might be tempted to go for a cream grip paint instead if it’s cooler for the interior. I saw that on a similar ages boat recently and it looked very nice, the sMe vibe as teak in a way.
Anyway I’m all ears!
Regards to you all,
Duncan
August 14, 2017 at 07:15 #26137Ollie Holden
ParticipantHi – none of the stripdown has been particularly difficult so far, but I’d ascribe that to this being my second refit of Nutmeg, so I’m a bit more familiar with how things are put together/come apart.
Re: the fridge – I took the front panel off (just screwed on) and from here you can slide the top of the fridge unit out. I had bolted the refrigeration plate to this, so I needed to slide it out with care, to avoid bending the refrigerant hoses. From here, I think I can access the one stanchion base. When I replaced the chainplates ten years ago, I made a little inspection hatch to access the aft port plate, which can be accessed from the cupboard fwd of the fridge.
Re: the winch bases – I’ve taken the winches off still attached to the bridge. I managed to get to the bolts with a combination of socket set and spanners. Since doing this, I invested in a set of stubby spanners as I think these might help. They are bolted on with three bolts through the deck, and two bolts into the coaming, with an aluminium backing plate.
I am working from the aft deck forward. I’ve found a reasonable amount of soggy plywood under the mizzen mast mount which will need dealing with. I’ve also got a lot of white powdery substance coming out of the holes when I took one of the cleats off – I suspect the aluminium plate has corroded. Not sure yet whether I will try to remove/re-bed – will decide when I’ve removed the teak deck.
I will take a load of photos and post a link.
August 29, 2017 at 12:50 #26151Sailornick38
ParticipantOllie,
A few years back we pulled the teak off Raga’s deck. She is hull 123. After filling all the screw holes we went back fiberglass then Kiwi grip paint for a non skid surface. Are doing most of the work yourself? There are many things to be learned as you move along with the project. Let me know where you are and I will tell what we did. Which may give you some insight on how to proceed.
The nuts holding the shrouds were British Standard Fine on Raga which were impossible to find in the US. Hull 123 was launched in 1973. Only an Englishman in ship repair trade would know that BSF was discontinued in the early 1970s.
Best of luck on your project
George
GeorgeSeptember 1, 2017 at 18:52 #26152 DarioParticipant
Ciao to all
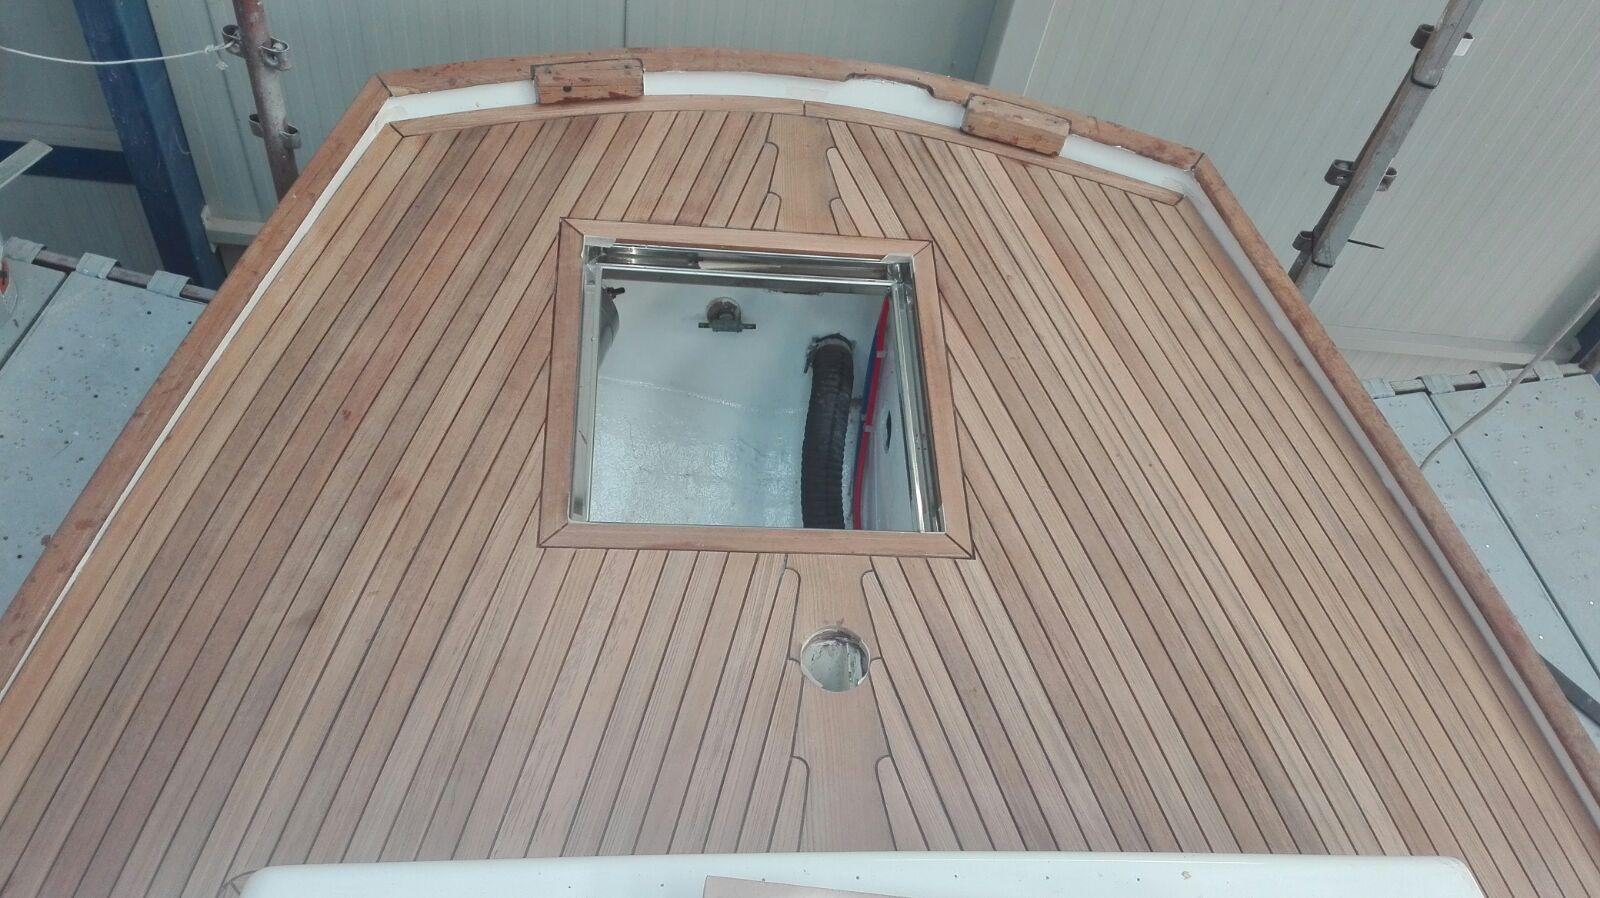
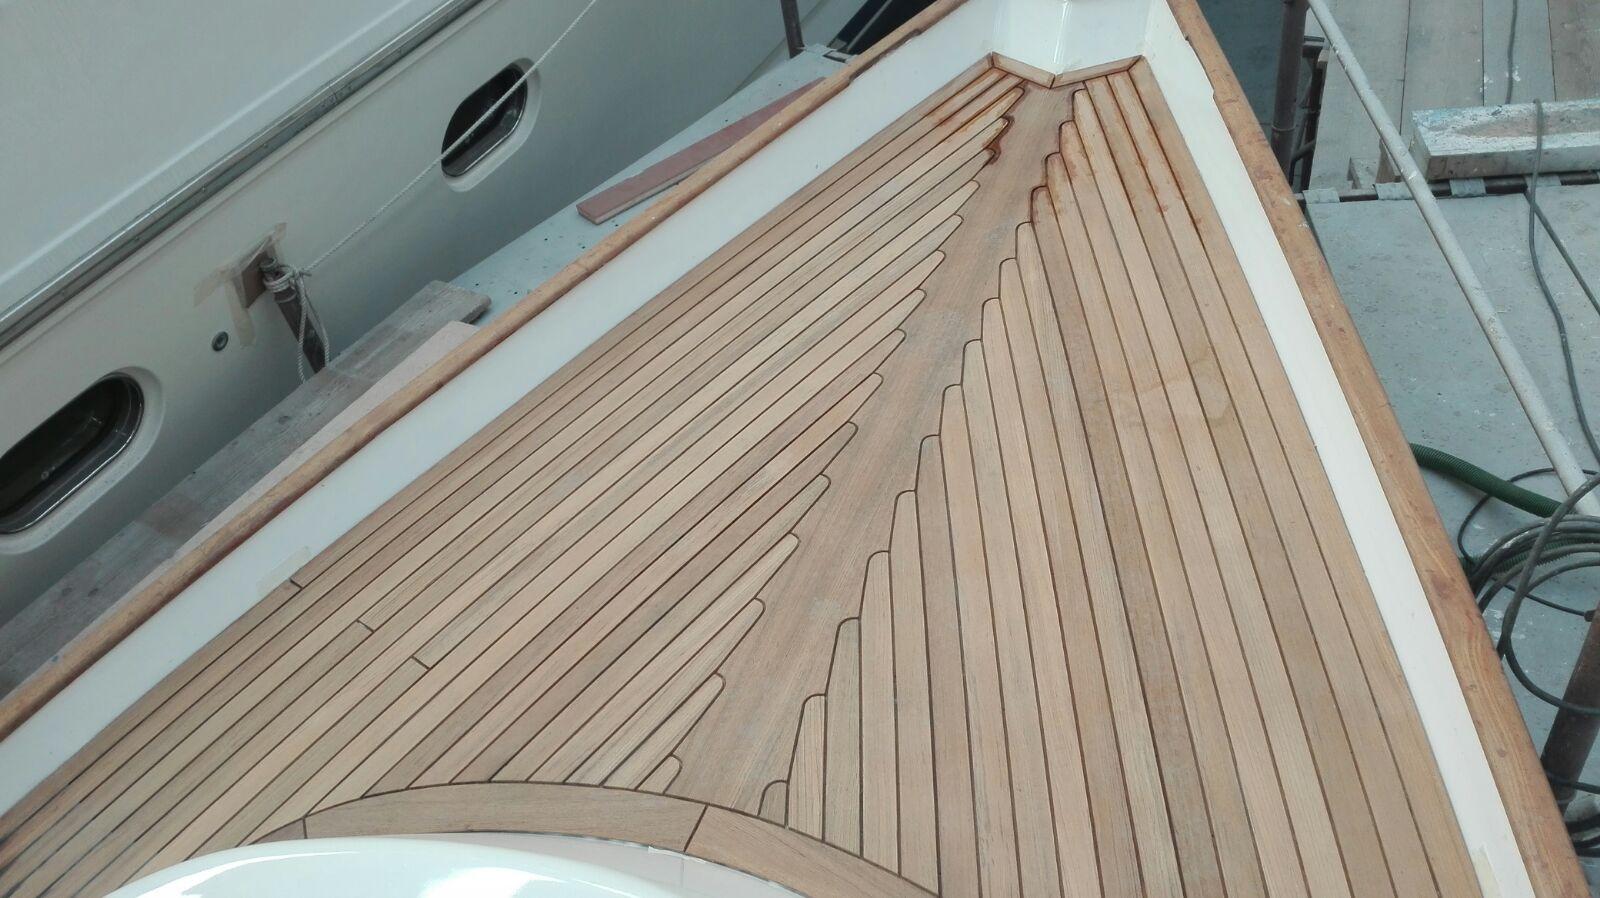
We are going with teak replace. Since now we took about 1 week to remove old one, and 1 week to put new resin slice (we need it… Rain came inside in some point).
Shipyard needs two month for ordering teak and on month for setting it on deck.
On end of october they will start.
You can follow on FB “Nelson Shelter”Ciao !
DarioNovember 25, 2017 at 22:08 #26183Ollie Holden
ParticipantUpdate on the teak decks. Wasn’t too bad a job to chisel off the old teak, and I found what I expected – the grp deck had lifted in places. When I dig into the grp i found the culprit – the aluminium pads that were bonded into the deck as backing pads for all the major deck fittings (cleats, stanchions, Genoa tracks etc). All these had corroded where the stainless bolts had let water through over the last 45 years, and the resulting aluminium oxide had expanded and pushed up the grp. Not unexpected, so I cut all the pads out, and have filled the resulting voids with layers of biaxial cloth with epoxy. A lot of work to bring back up to a flat level. We’ve then sheathed the entire deck with three layers of biaxial cloth, as there are a few areas where the deck flexes when someone heavy stands on it.
The other major job whilst the teak was off was to sort the aft deck. We had the usual sag under the Mizzen mast so I cut the entire deck out between the two fore and aft bulkheads. The ply sandwich was rotten hence the sagging. I have had a stainless steel “tray” fabricated which is bolted between the bulkheads and provides compression strength for the Mizzen, and lateral support for the rudder stock. I can send photos if anyone’s interested.
I also removed the anchor well and filled with 1” marine ply epoxied into place. We have a Delta 20kg on the stem head and never used the anchormwell, plus it cuts into the fore peak space.
I’ve had to do a fair amount of filling of the pads under the deck, so there is a sound base for all fittings to bolt onto when I get to re fit everything.
The teak has arrived (after lots of chasing quotes ive eventually got it from Robbins Timber – not cheap but it comes fully finished and they are a quality timber merchant) so hopefully we can start laying in the coming weeks – we have a tent, light and a heater.
I stripped the teak in September so it has taken a couple of months to prep. A big refit but hopefully will last a few decades.
Whilst the boat is in bits, I’ve also taken the opportunity to do a bit of work inside. I’ve glassed in a small bulkhead just behind the mast step as the main saloon bulkhead doesn’t extend right down to the base of the mast, and there has been a small amount of movement here in the past. Also fitting a holding tank in starboard forepeak, removed water heater in galley (and subsequently redone all freshwater plumbing), and fitted a locker under the starboard forepeak for the windlass battery. If anyone would like more details or photos, please shout. Nutmeg is in Wilsons Boatyard on Hayling Island, you’re welcome to come and visit.
November 28, 2017 at 08:58 #26184 Czarina BlueParticipant
Good job, Ollie! All very interesting and telling.Thanks for sharing. Greetings from Pollenca, Mallorca.
December 22, 2017 at 18:50 #26198 Erik TheunissenParticipant
Hi Ollie
Sounds like a pretty extensive refit. Since we are outfitting Ilmatar in the coming year for long distance travels/blue water cruising, we are very interested in some of the work you are doing, especially replacing all the corroded, weak deck fitting, chainplates etc. So all pictures are more then welcome and greatly appreciated
Regards,
Erik
December 27, 2017 at 21:43 #26205Ollie Holden
ParticipantHi – not sure how to post photos. Try this link which should take you to the refit album. https://photos.app.goo.gl/f5ddTsscpPlJzuhr1
December 29, 2017 at 02:24 #26207Orion
ParticipantHi all,
My heart goes out to everyone dealing with aging teak decks. I don’t face this with Orion, hull 52. But, I have removed teak decks on 22 boats, Baltics, Cheoy Lee’s, Swanns, and a Hylas. We absolutely do NOT let the owners observe the work. It’s far too brutal. GRP underdecks take our 3 man crew a single day, to strip.
Resurfacing and bolstering the GRP is the preferred replacement. We’ve tried stamping gelcoat, for tread. But kiwigrip is a good product. Limits recoating to more kiwigrip.
Replacing the wood is done in troughs, using recent adhesives, and 100 pound lead ingots. The result is a contemporary look.
And it’s all hideously expensive.
December 29, 2017 at 04:04 #26208Orion
ParticipantHi Ollie,
I looked at your refit album. Work looked great! Looks like a meticulous process. I’d love to see the finished album.
Regards,
michael (on Orion)January 7, 2018 at 12:21 #26210 Erik TheunissenParticipant
Dear Ollie
Thanks for the pictures. Makes everything a lot clearer. What a job, that’s basically rebuilding the whole boat!!! Very interested in more pictures of the progress of your work.
Regards,
Erik
January 24, 2018 at 08:23 #26242 DarioParticipant

this is my new teak.
You can see more on Facebook “Nelson Shelter”
Ciao
-
AuthorPosts
- You must be logged in to reply to this topic.