Welcome Back › Forums › Deck and Hull › Interior outfitting › Head lining
- This topic has 4 replies, 2 voices, and was last updated 2 years, 3 months ago by
Mike and Cathy Donegan.
-
AuthorPosts
-
February 9, 2022 at 15:35 #27086
Mike and Cathy Donegan
ParticipantBelow pictures show how, due to the dehumidifier being switched off, condensation has caused the edges of the headlining vinyl to come out of the gripper rods on both sides of the saloon. We’d be grateful to know if anyone else has found out how to tuck the vinyl back inside the gripper rods! We’ve tried heating the fabric and the rod but it soon cools down and won’t clip back with the vinyl tucked in, though the empty outer rod clicks into place with no difficulty. We don’t want to replace the whole lining as the rest of it is very neat and in good condition.

 March 21, 2024 at 18:59 #27473
 ModeratorKeymaster
I’m copying over how Kestra now has a new headliner, where they described it in another posting. This info is from Mike, Kestra’s owner, not me –
Marilyn, moderator
*****
Condensation had brought down the edges of the ceiling, so we removed the fabric and the plastic clip trim leaving the screw fixed male runner. All ceiling mounted bits, lights etc were removed and cleaned.
A centre line was established fore and aft in the underside of the coach roof and the ceiling was set out to approximately the panel strips of the original ceiling but with a break at the centre line.
The ceiling was cut from 1mm hygena sheets used for clean rooms which is available for delivery rolled up. Three 1mx2m panels were ordered. I investigated thicker material but it is heavier and less flexible. This material is very shiny so it was covered with white non-foam backed vinyl from a yacht upholsterer and stuck on with evostik.
The panels without vinyl are set out to the centre line and the square corner of the panel establishes the line across the coach roof. A gap of approximately 10mm was left at the edges which are not square with anything. The panels are measured, marked out and scored with a sharp, knife and snapped. The panels were butt jointed and haven’t needed a joint cover.
Any holes needed are cut and then the vinyl is stuck on and folded over about 20mm. Inset from the 20mm 100mmx25mmx6mm hardwood battens are fixed on the coach roof and heavy duty Velcro is stapled to them. The other part of the Velcro is then stuck to the underside, the Velcro has its own adhesive. Finally the panel is offered up and pushed home. None has come off. We are very pleased with it.
The 6mm gap needs to be maintained because of condensation and the ply patresses used to mount lights etc which abound.
April 5, 2024 at 10:51 #27475Participant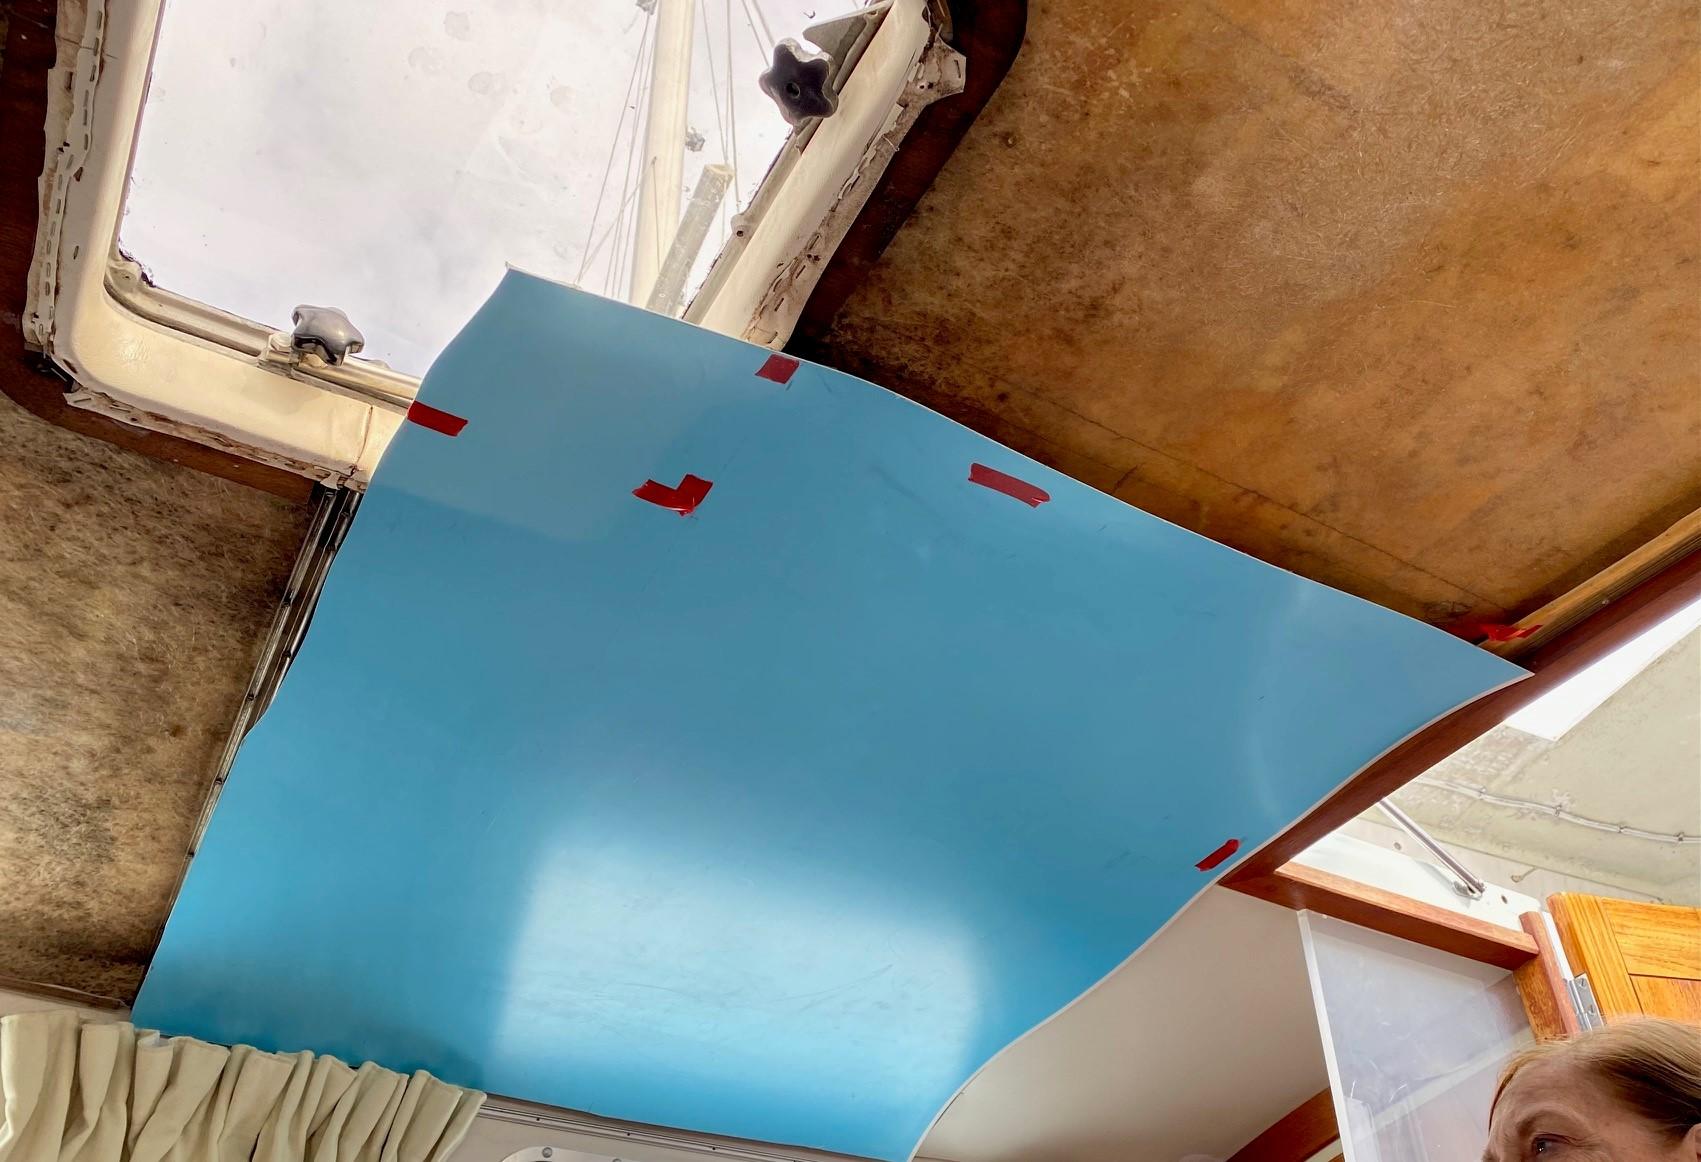 April 5, 2024 at 10:54 #27476Participant
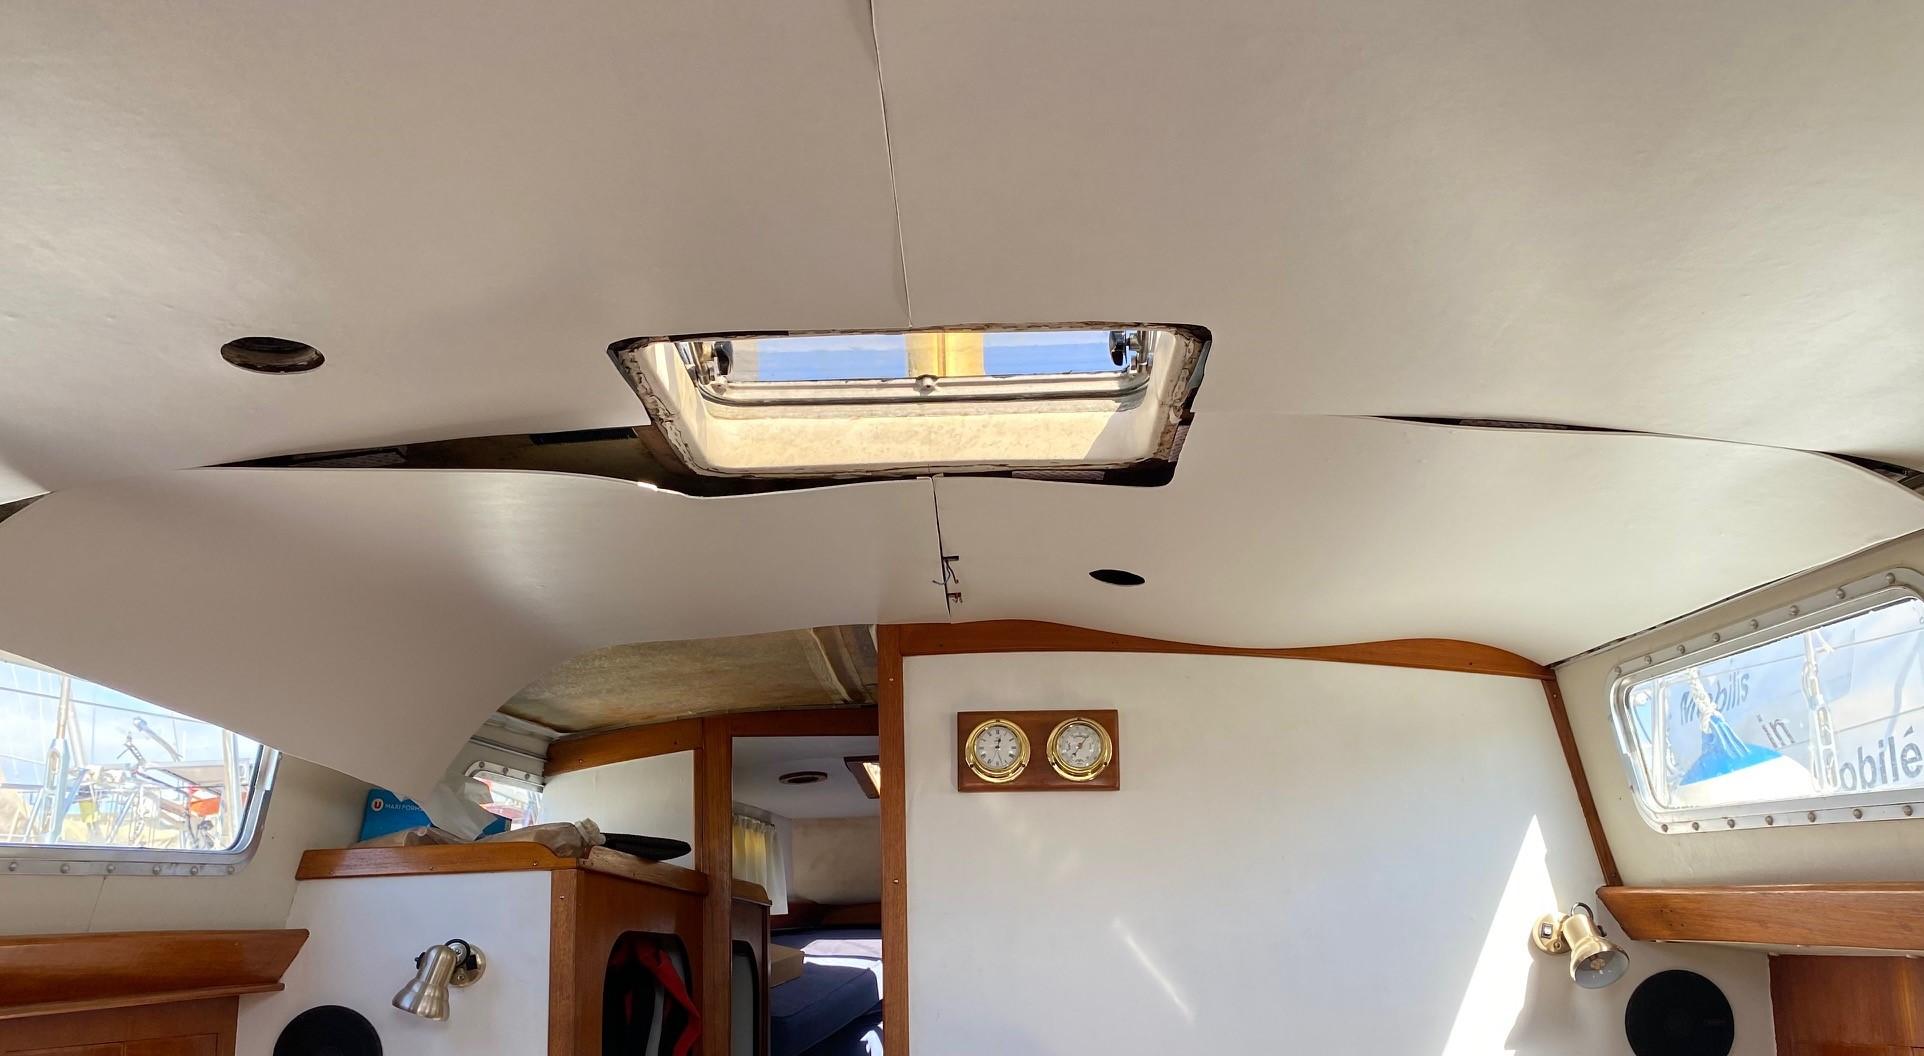 April 5, 2024 at 10:57 #27477Participant
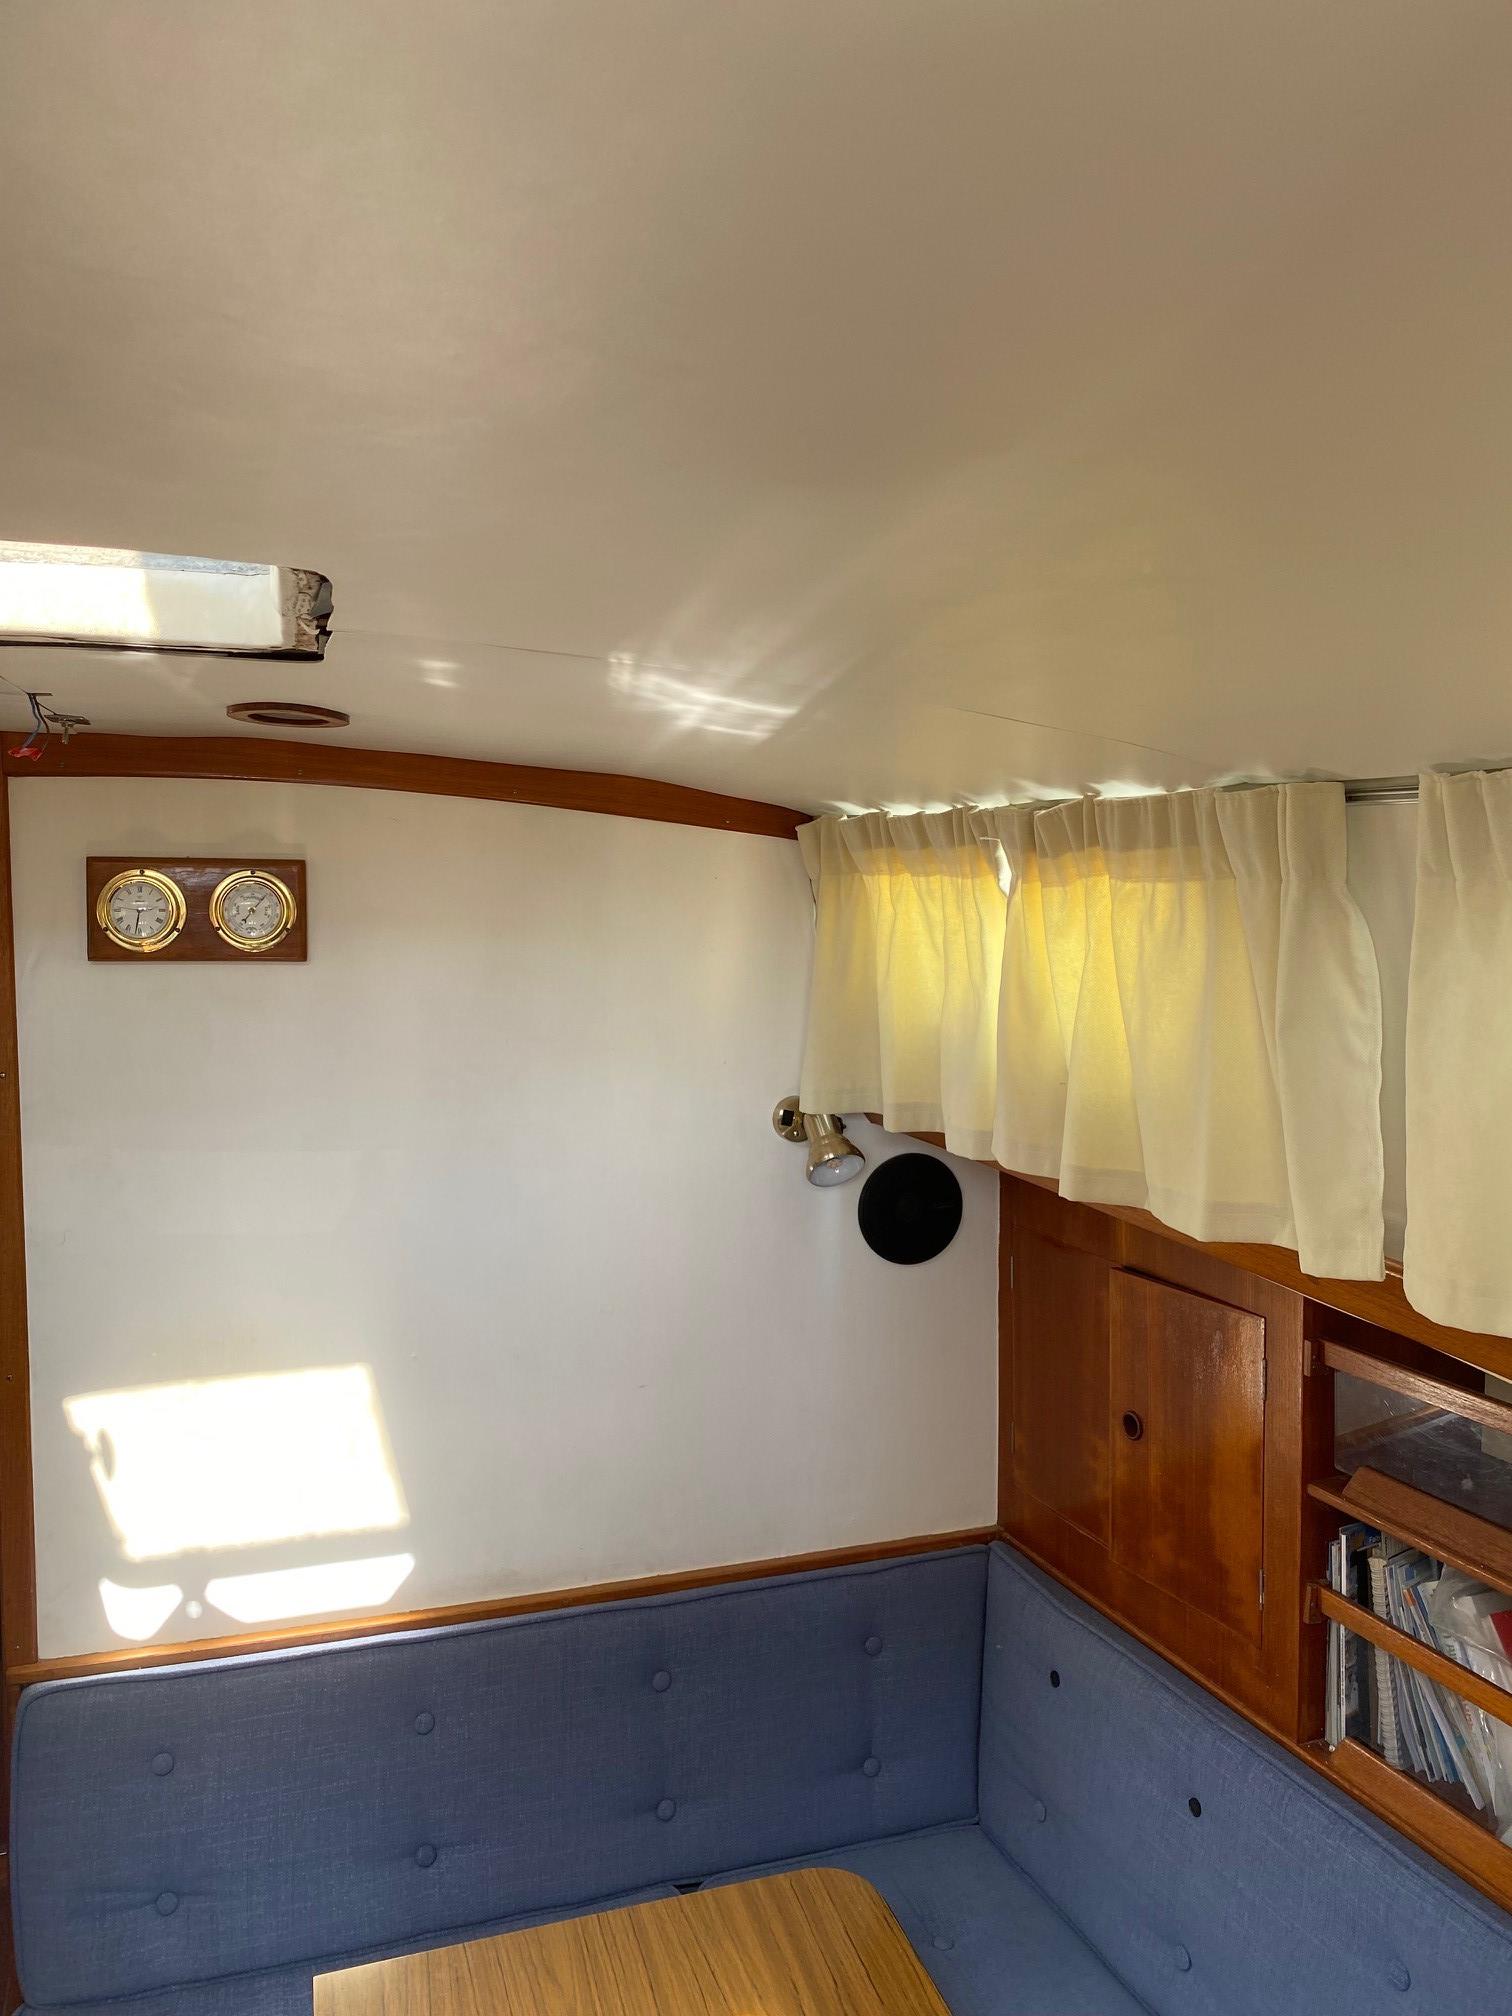
-
AuthorPosts
- You must be logged in to reply to this topic.