Welcome Back › Forums › Deck and Hull › Deck and deck fittings › Anyone removed deck hand holds?
- This topic has 15 replies, 5 voices, and was last updated 3 years, 6 months ago by
 Moderator.
-
AuthorPosts
-
June 9, 2021 at 19:09 #26968
 ModeratorKeymaster
I’m curious if anyone has removed the teak hand holds/grab bars that are on the cabin top (fore and aft) and on the coach roof? Can you offer any insight as to how these are held down?
We are in the process of remounting everything that penetrates the deck, replacing all fasteners as we go. I read an article from an owner of a different good old boat owner who said he discovered his grab bars had very badly corroded stainless fasteners after one grab bar broke off in his hand.
Those hand holds are such critical safety features, I am thinking of removing one to see how it looks – but curious if anyone can offer some thoughts before I destructively remove those lovely teak plugs that cover the screws.
Thanks – Marilyn
June 14, 2021 at 20:27 #26973 Guy HParticipant
I thought I read somewhere in all the paperwork that they are bolted into captive ‘nuts’ that are glassed in. Obviously helps with stopping water ingress but if they break or snap in there it might not be so great!
I need to do the same as the rear end of the stbd hand rail has come away!
June 22, 2021 at 15:14 #26976James Timms
ParticipantNo, but I am just about to starting with the small ones aft! I have bought replacements for the 1 loops and 3 loops from Force 4 chandlers. Im looking where I can get hold of the longer ones.
June 27, 2021 at 19:55 #26979Ponape
ParticipantHi,
We had a grab rail come loose on the cockpit roof and after using an impact driver to remove the screw only succeeding in damaging the screw head (underneath the teak plugs) I gave up and drilled two holes either side and drilled and bolted through.
Possibly not the best approach but it’s solid and safe now. We used dome head bolts on the underside to make it as neat as it could be.
all the best,
George Dadd (Ponape)
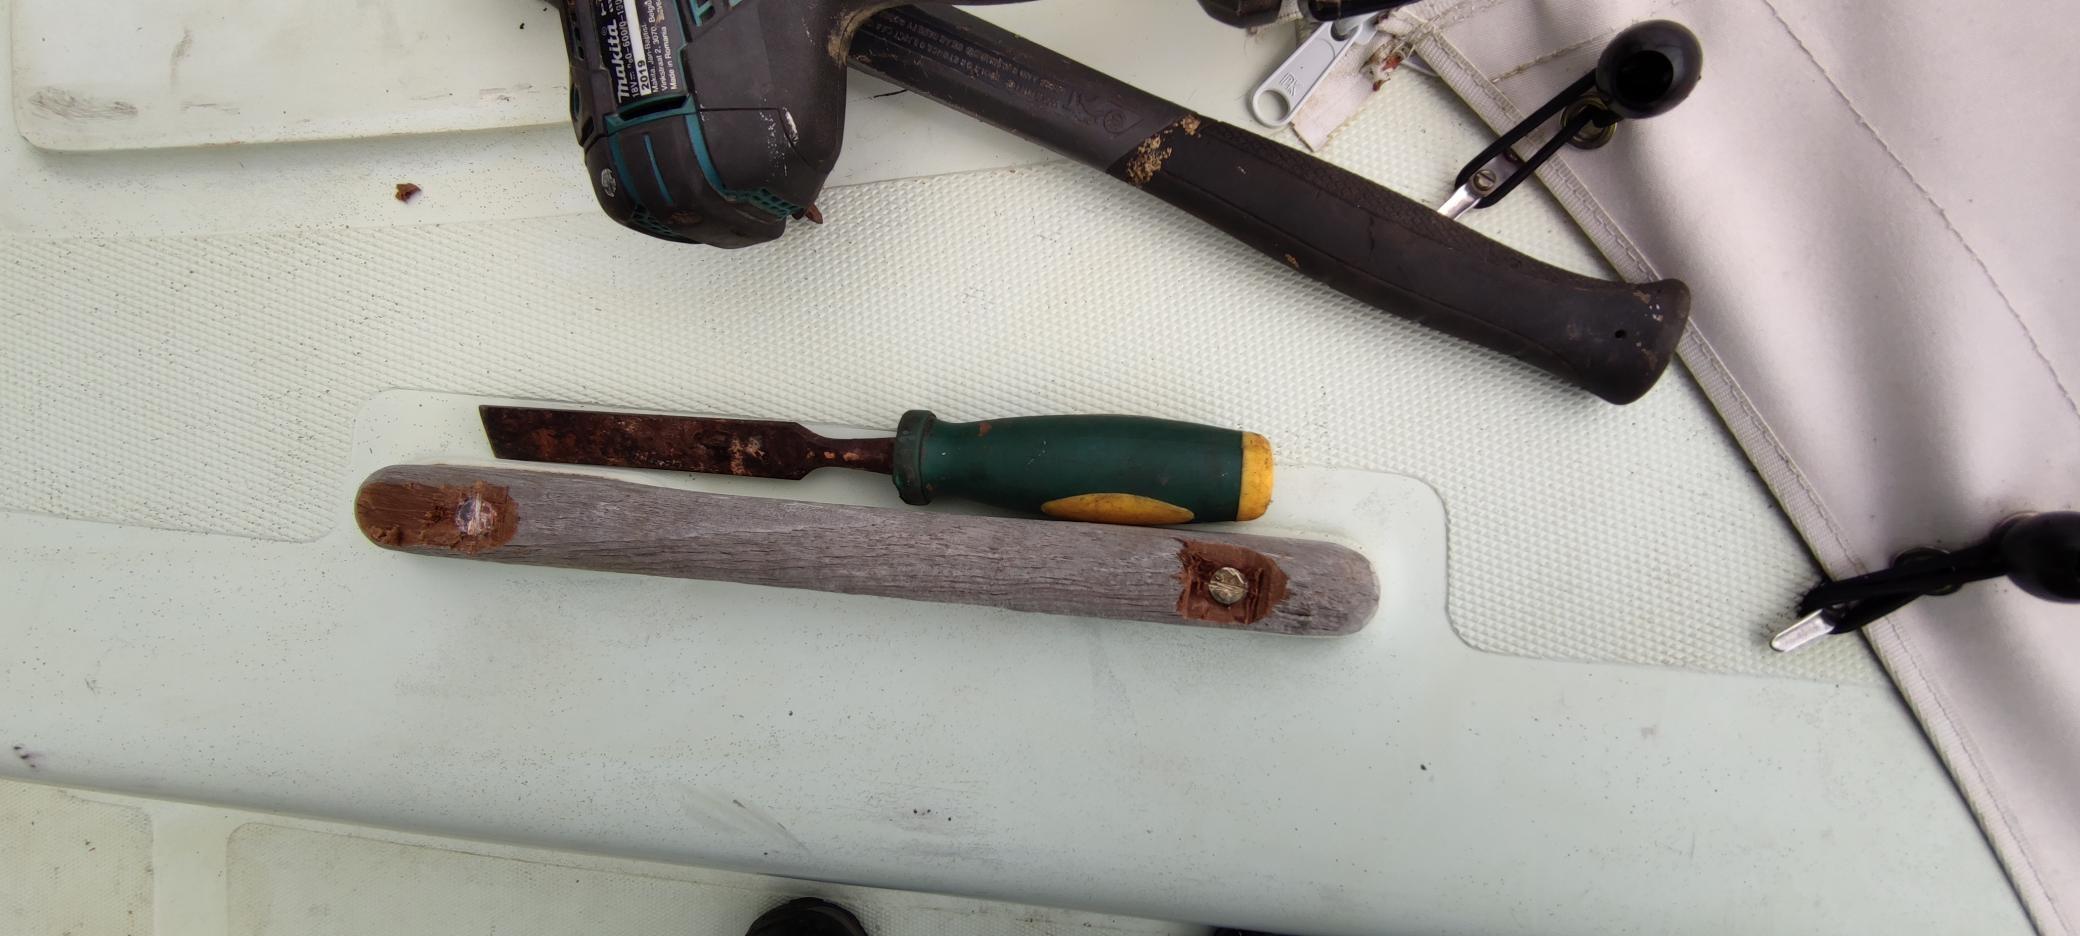
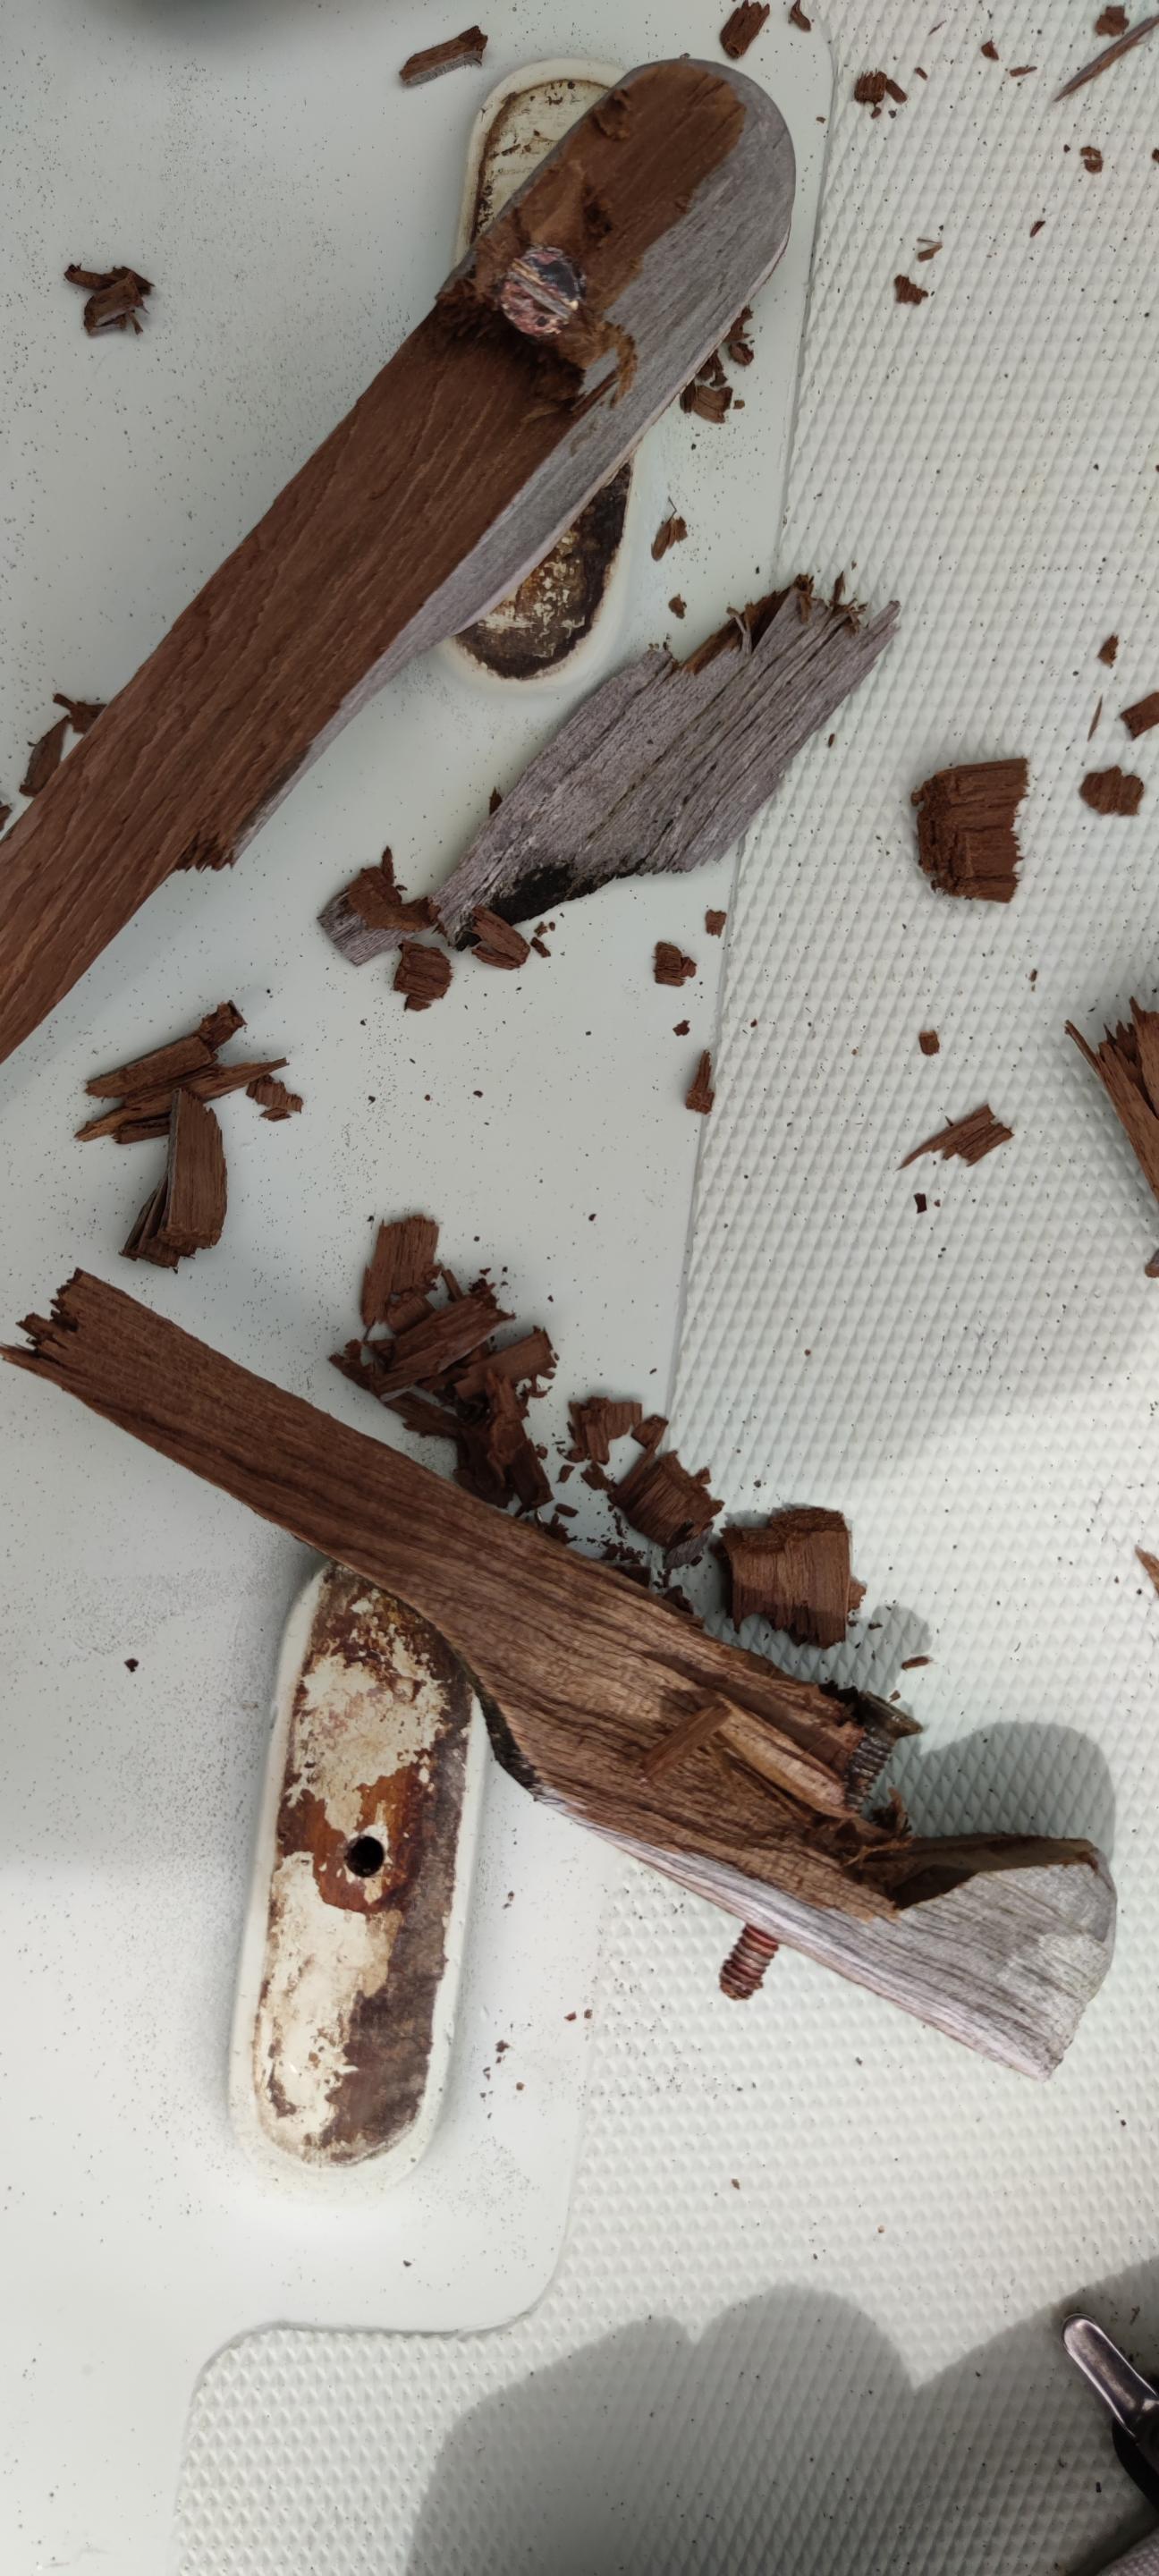
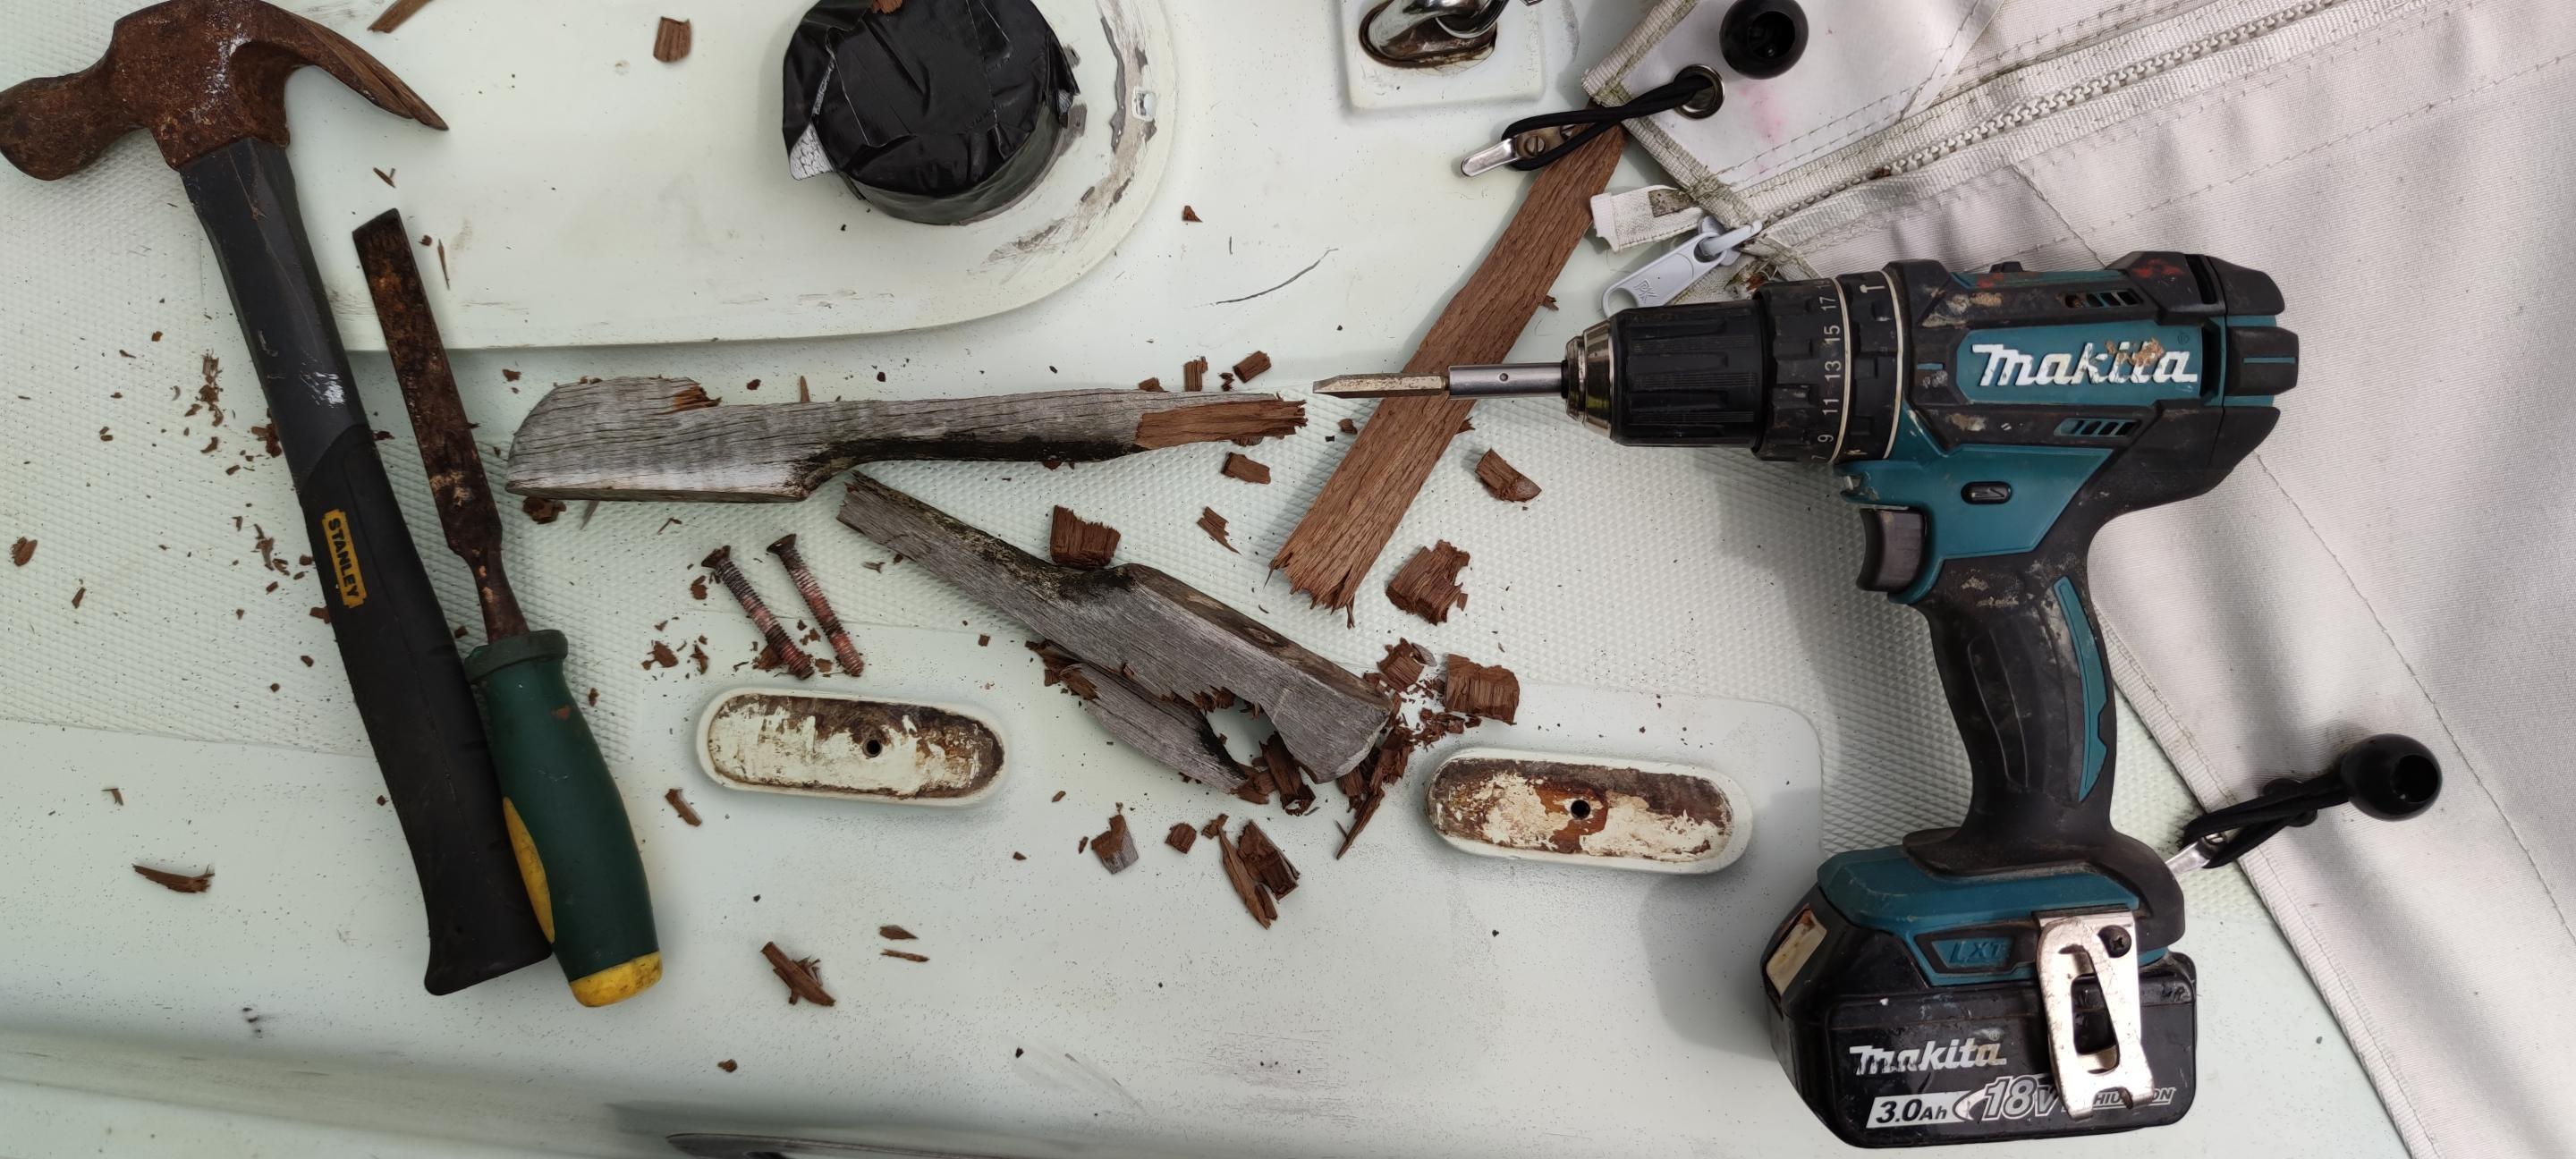
July 5, 2021 at 16:11 #26984ParticipantOK, I tried a bunch of times to submit here with pictures but it kept failing and losing my commentary and photos!. Briefly the copper bolts are epoxied to the handles but not into the coach roof. Whip out the plugs and excess wood around the bolt with a chisel and they screw straight out. So clean that I could reuse. I used a 6mm bit and 13mm spade on the new for the existing bolts, plus sikaflex on my test one, probably changing to epoxy for the next. Will stick some photos on Facebook page if it helps! Whole replacement took less than 20 minutes which is a welcome change for a boat job!
July 5, 2021 at 19:28 #26985ModeratorKeymasterThanks for the info, and nice photos on FB group. Looks like one handhold got destroyed in process?
You might consider sealing the handhold down with butyl -we’ve been using this on all our rebedded parts and very happy with result. It remains pliable, so should retain seal even if boat flexes, which is always does when at sea.
There must be someone in the UK who offers similar butyl tape, but do realize that not all things sold as butyl remain as pliable as this Compass Marine variety.
Sorry about the very poor support for photos here. I really should look into that someday – or if someone wants to help?
(Addendum: As administrator, I found James posting above that he says disappeared – I just approved it and now it appears lower down in this thread…. Sorry!)
Cheers – Marilyn, moderator
July 6, 2021 at 07:31 #26988ParticipantHi Marilyn,
As I was replacing the hand holds (it was giving off a nasty creaking sound) then I didnt mind wrecking it. TBH that was really a test run, I will check out butyl for the others, these handles are deeper than the originals and I am thinking about sourcing some longer bolts too for additional strength.
Cheers!
July 30, 2021 at 19:46 #26996Guy HParticipantHi Marilyn
I’d be happy to help with the website
Guy
August 9, 2021 at 17:07 #27001ModeratorKeymasterThanks Guy! I will contact you via email to discuss more.
Marilyn
September 20, 2021 at 14:08 #27058ParticipantOK, Ive been ticking along in the background with lots of boat works. However I did not do much on this little project. I have some learning to share. The 3 and 4 and 5 loop standard handles do not fit the CN38, so I have ordered teak to remake. I have also removed the fixings which tie the cockpit roof to the foredeck, I am also remaking those, to remove I drilled out the screw heads from inside and they just fell off. The old butyl underneath was dry. I have sourced some butyl to fix the new handles.
September 20, 2021 at 21:03 #27059Guy HParticipantThe 3 and 4 and 5 loop standard handles do not fit the CN38
That’s very useful info – I will make more of an effort to rescue mine then!!
September 30, 2021 at 11:27 #27060 David and FelicityParticipant
We removed the overhead handles from inside the cockpit. In fact one of them came off when I put my weight on it in a force 7! They were held on by brass screws that had almost completely de-zincified and were a pain to remove. We replaced them with heavier duty marine grade stainless screws, sealed with Sikaflex. We have had no problems since.
October 11, 2021 at 08:39 #27061ParticipantHi,
I removed the coach roof ones this weekend (both sizes), the machine screws were significantly perished. Sounds like David realised my own fear that when you needed those handles they werent to be trusted. Im going to attempt to make a router template using the old ones, im thinking a flush cutter and a rounding over bit might be enough to make the new ones. If that doesnt work Ill find a local CNC shop to measure and cut my new ones.
Cheers
July 18, 2022 at 01:41 #26982Participant(Moderator: this is the note James tried to post earlier, but had problems because of the photos – my apologies to all!)
Hi,
I did one of the small aft ones as a test at the weekend. Finding was that the bolt is epoxied into the handle, but only tapped into the coach roof. Tried two techniques to get them off, both worked well and can be combined:
- Remove wooded plug with a chisel so that you can get to the bolt head (be careful its copper)
- Remove excess wood around the bolt with chisel or dremmel
- Unscrew the bolt, clean off the excess wood from the bolt and sand down adheasive from the coach roof
- (I used the original bolts on the new handle) 6mm HSS to cut the hole in the new handle, 13mm spade to cut the countersink for the head and a bevelled plug).
- I used sikaflex for the base adhesive for the handle and for the plug however I am in two minds about epoxy with the other handle
Hope this helps
 August 10, 2022 at 19:45 #27255ModeratorKeymaster
We pulled one coach roof hand hold fastener to determine size, etc. We found that after digging out the teak plug, there is a brittle layer of epoxy/varnish(??) over the screw head, making me think the screw head was disintegrating. Thankfully ours didn’t. We dug out that brittle stuff to find the fastener head with a slotted drive, and were able to easily back it out.
The original fastener is a 1/4″-20 flat head machine screw 1 3/4″ length. It’s made of bronze, and on our 1974 boat, the head and one threaded portion are quite pink but other areas look fine. The wear pattern suggested that the threaded part was being held tight in one plane about 1\8″ thick.
The next question is – what was that fastener screwed into? The deck details drawing (075.tif from the CD) say “1 1/2″ x 1″ brass plates under fore and aft handrails P & S.” Did they really embed BRASS? Drawing 74 says “aluminum” for that same note. Regardless of whether they used brass, bronze, or aluminum- given that the caulking material under the teak handhold has failed, the backing plate will have corroded as well. So simply threading in new fasteners seems highly suspect if the threads in the backing plate will crumble away.
Another concern is the coach roof drawing shows it has a balsa core, and we recall the cabin top deck is wood cored, at least where the vents are. So if water has gotten in around the hand hold fasteners, the coring surrounding the backing plate may be rotting as well.
It will be simple to add a new backing plate to the underside of the coach roof and through bolt the hand holds in place. But not so in the cabins because we still have the original headliner that is impossible to reinstall after removal. So rebedding the hand rails turns into a headliner replacement job after adding new backing plates to the underside of the deck over the fore and aft cabins. I guess we could cut little access areas in the headliner and tape them back up so we could go sailing rather than work on the boat, but that’s ugly. Another solution would be to make mating mirror image hand rails on the inside of the cabin, and through bolt outside and inside rails together with the deck between. Don’t know if that’s feasible or not, just an idea I read in Casey’s “This Old Boat” book and I thought it was a clever solution.
I’m wondering if anyone has really dug deeply into this hand rail replacement project and understands whether my concerns about corroded backing plates and rotting cores are valid. It seems so much more secure to through bolt hand rails with suitable backing plates.
Thanks in advance.
September 24, 2022 at 23:22 #27306ModeratorKeymasterHaving just reinstalled the starboard side coach roof handrail, I can answer some of my own questions from above.
First, it was not easy to remove all the original screws as I first suggested. They were badly corroded, so each turn using a flat head screwdriver was a battle the entire thread length. The easiest way to deal with removing the bronze screws is drill off each screw head, lift off the handrail, and then turn out the screw stub using a big locking pliers.
The solid coach roof construction appears to be, starting on the outside, Gelcoat, GRP, backing plate (which creates the raised region the handrail sits on), balsa core, GRP without gelcoat. The total thickness is approximately 1.5 inches (40 mm). There is approximately 5/8″ (16 mm) layer below the backing plate that consists of balsa core plus GRP.
Aside: It may be that inside GRP layer still has the resin curing wax coating. The PO tried to paint the underside of the coach roof and the paint is peeling badly due to poor surface prep.
Our solution to reattaching the handrail – we used 1/4-20″ brass threaded inserts on the underside and 2″ 1/4-20 SS screws. Here’s how we did it.
1. From the inside, use a 3/4″ drill (20 mm) to remove the bottom GRP and balsa core, but do not drill through the backing plate. Dig out any wet balsa core (fortunately, ours was dry). The goal is to make a big plug of epoxy below the backing plate.
2. From the inside, tape over the through-hole to plug it. Then from the top side, use a syringe to fill the hole with epoxy without air bubbles. The epoxy will wick into the balsa core and lower the level of the epoxy fill- be sure to add enough epoxy to account for this balsa core wetting. The epoxy will seal the balsa from further water damage.
3. Once the epoxy is fully cured, use a 1/4″ drill to make a new through-hole in the center of the epoxy filled hole.
4. The brass inserts we used came in a kit that included the required 25/64″ clearance drill bit. We used that to drill from the bottom side up to, but not through, the embedded backing plate. We then used the SS screws from the top to drive those brass inserts in with the correct alignment until they abutted the embedded backing plate. In essence, we are using the brass inserts to increase the screw thread holding beyond just that of the (probably) corroding original backing plate, which still has good overall integrity, but maybe poor thread holding.
5. Once the brass inserts were properly threaded into place, we installed the handrail using butyl tape between the gelcoat and teak handrail. Once screwed in back into place, we put a thin layer of butyl over the screw head before we epoxied in new 1/2″ teak plugs.
The 2″ screws we used was a good length because the screw has full thread engagement in the brass insert, and only barely protrudes on the inside of the coach roof.
If we had found the backing plates and balsa core to be in terrible shape, we were going to use a new strip of hardwood on the inside of the coach roof as a new backing plate and use T-nuts driven into that wood strip to avoid having an acorn nut be a dangerous protrusion from the bottom side of the coach roof.
We’ve only done one handrail so far. In part, I am writing this down so I can remember how we did it once we get around to doing another handrail. But I hope this also helps someone else with this handrail rebed project. Since there is a balsa core, it’s important to do it before the balsa core is wet and rotting.
Marilyn
-
AuthorPosts
- You must be logged in to reply to this topic.