Welcome Back › Forums › Rigging › Standing Rigging › Inner forestay
- This topic has 10 replies, 3 voices, and was last updated 13 years, 5 months ago by
 michael bennett.
-
AuthorPosts
-
January 18, 2012 at 14:43 #5671
 Ronar MParticipant
Hi All
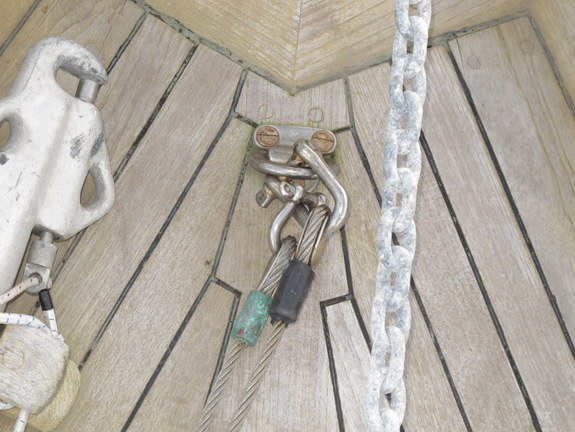
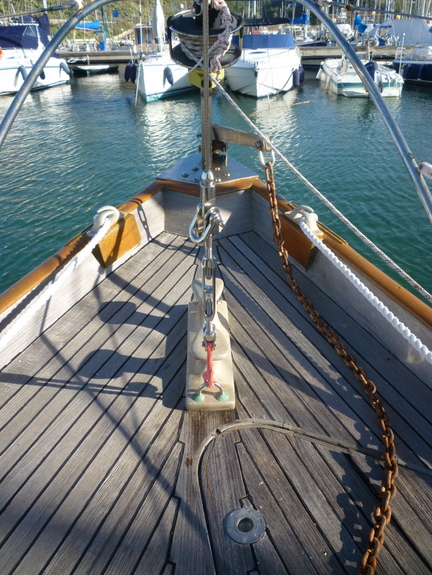
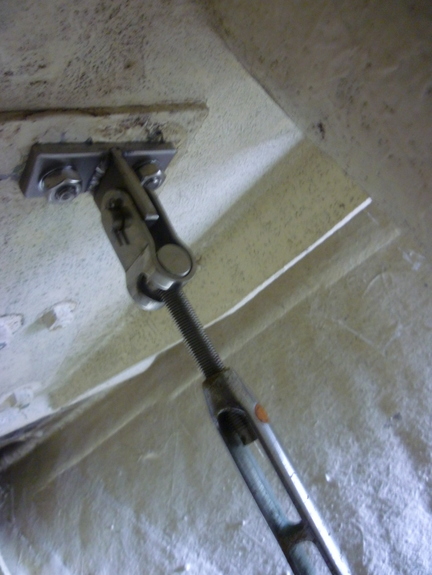
I promised some pictures of the inner forestay arrangement on Ronar M so here they are. The first one shows the plate on the foredeck. There are two s/s wires lying on the deck. One is for attaching the tensioner on the end of the forestay, the other is to attach the tack of the working jib (the storm jib has its own strop and so that attaches directly to the stem fitting).
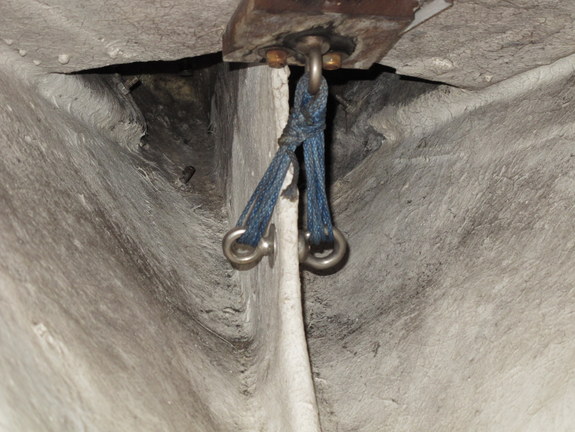
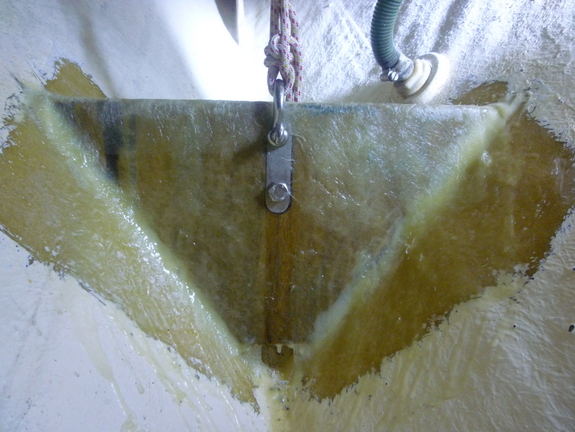
The second picture shows the arrangement below decks with the spectra lashing down to a strong point in the bows.
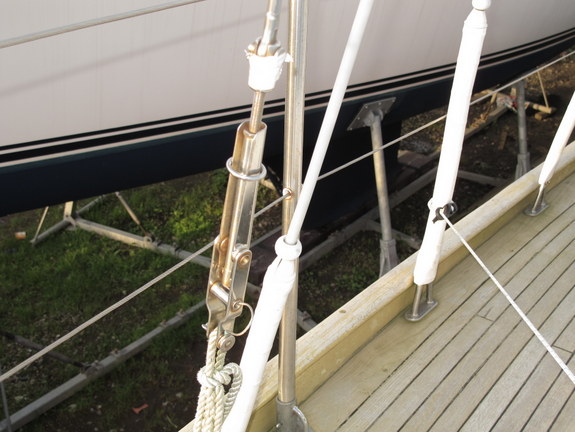
The third one shows the highfield lever for tensioning the inner forestay (in this case attached to a rope strop on the starboard sidedeck ahead of the main shrouds. In use it is detached from here and taken forward to be attached to its strop and tensioned up before the sail is bent on.
The inner forestay arrangement is further forward than others have suggested it should be but I have found that the consequent absence of a ‘slot’ between foresail and main is not a problem; as the wind picks up you are trying to depower after all. cheers, Trevor
 January 21, 2012 at 12:40 #11091
 Chihili QParticipant
Many thanks indeed Trevor for that. I have discussed things with the yard and we are going to adopt Roger’s solution regarding a deck fixture; for reinforcement I am going to have a SS plate on the outside of the stem and moulded to the hull shape; my main reason for doing it this way is that since Chihili Q collided with the pontoon (engineer taking her back to her berth after reinstallation of the engine, and with wonky morse control: full astern turned out to be full ahead)there is a visible repair at the level such a plate would need to be; I am not installing armour plating though! There will be a through hull anchor point with eye to attach a dyneema brace to the underside of the deck fitting. Seems an excellent solution, and a variation on both your suggestions.
BW, Adrian.
November 12, 2012 at 18:42 #12521 michael bennettParticipant
Hi Trevor,
Looks a great arrangement, the strong point in photo 2, did you glass it in yourself, it looks substantial.
As to the position of the inner forestay, what is the gap between it and your outer forestay, and how does it work when flying both using a roller reefing on the mainstay, which I presume you do.Regards
Mike
November 14, 2012 at 17:45 #12561Ronar MParticipantHi Mike,
No it was already there. I just had to borrow a right angle drill for the bolt hole.
Cheers, Trevor
February 11, 2013 at 19:25 #12941michael bennettParticipantHi Trevor,
I had completed fitting my inner forestay, been trying to post the photos here but not much success so sent them to Marilyn asking her to post them.
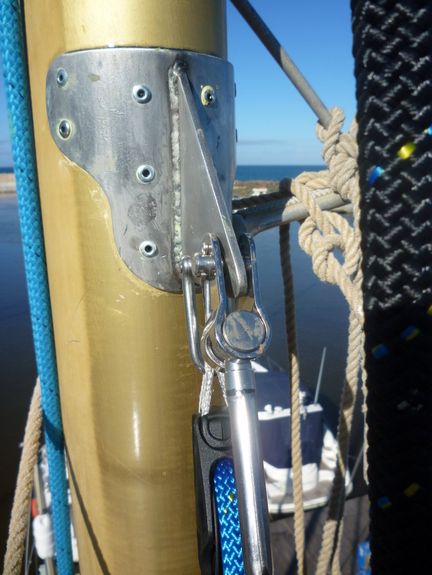
Made and glassed a new bulkhead directly in-line with the under-deck fitting, which was a C bolt fitted in the aft staghead bolts, to prevent any twisting moments under stress. I connected the bottom of the forestay using a soft shackle made from pure dyneema to the turnbuckle which folds up to the stay for parking at the shroud when not in use. Photos will help when posted. I had a fitting made for the mast head and riveted in place using Duralac between them.
Regards
MikeFebruary 12, 2013 at 14:01 #12971michael bennettParticipantHi Trevor,
Think I have found how to post now:
 February 12, 2013 at 14:09 #12981michael bennettParticipant
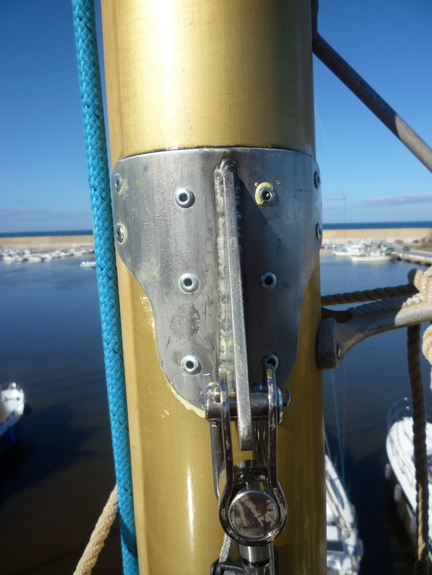
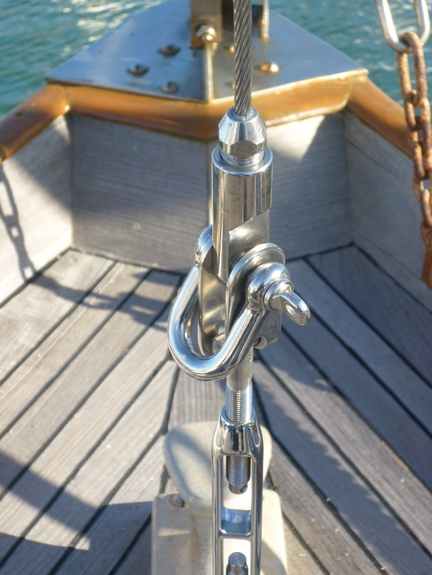
Top two show the mast head fitting I had made locally, riveted to mast, bottom one shows deck fitting via a dyneema soft shackle, the turnbuckle connected to staylock on the stay, using a shackle as a pivot so the turnbuckle can fold up when stowed, using the shackle to do so, with another soft shackle made to size.
February 12, 2013 at 14:18 #12991michael bennettParticipantMore photos:
 February 12, 2013 at 14:34 #13001michael bennettParticipant
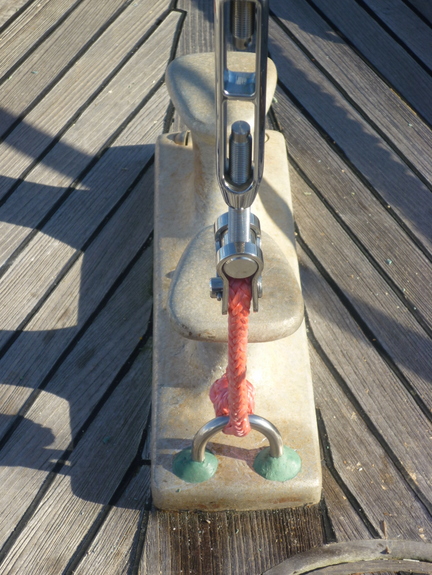
Two more showing the deck end of the stay, the ‘green stuff’ around the U bolts is a sealer a neighbour who lives aboard introduced me to, it works like an epoxy, is two lots of plasticine like material in use, one lot blue other yellow which when mixed in equal proportions so it becomes ‘green’, and begins to go hard, I used some under the washers first so it squeezed down between the holes and the bolt shaft, and then covered the nuts to ensure no water ingress.
Sending some more of underdeck next,February 12, 2013 at 14:43 #13011michael bennettParticipantMore photos:

 February 12, 2013 at 15:00 #13021michael bennettParticipant
Top one shows complete support assmebly, connected to the new bulkhead using dyneema again, middle one of the ‘T’ bracket locally made, bolted to the U bolt, with the tang in same direction as any stresses, and the third showing the new bulkhead (prior to some painting) made from 25mm marine ply, three coats of epoxy prior to fitting and glassing in place, as directly underneath the deck fastening as I could get, to prevent any undue ‘moments’ acting on the bulkhead.
The stainless plates are either side, (they came with the U bolt so found a use for them)and between them are s/s tube glassed in oversize holes and completely filled with epoxy, then drilled out to fit both the connecting shackle bolt and bottom bolt, the tubes spread the load wider than just the bolt diameters would.
I have drawings of the fittings used if anyone wishes to see them.
Regards to all, Mike -
AuthorPosts
- You must be logged in to reply to this topic.